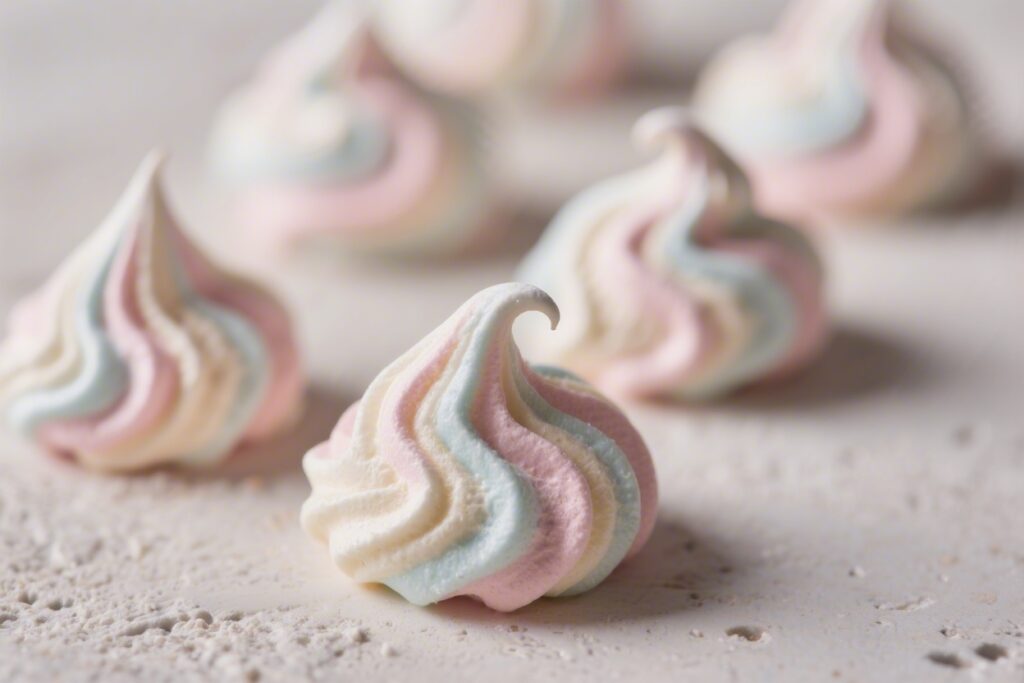
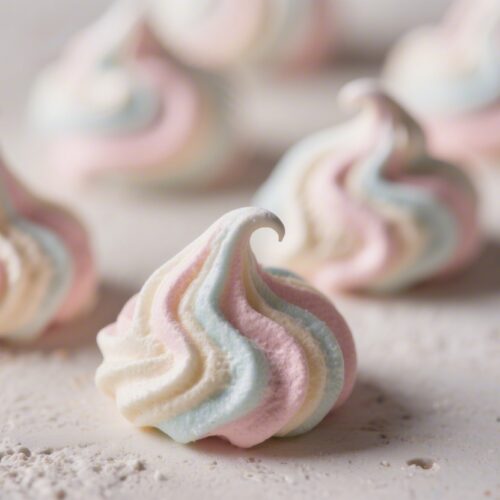
These pastel swirl meringue kisses look like little clouds you can eat, and they’re easier to make than you might think. With a crisp shell, marshmallowy center, and whisper of vanilla, they’re the kind of treat that makes people smile before they even take a bite. The pastel swirls add a soft, dreamy touch that’s perfect for parties, gifts, or just a pretty weekend baking project.
They’re naturally gluten-free, budget-friendly, and surprisingly forgiving when you follow a few simple rules.
What Makes This Special
These meringue kisses are more than just cute. They deliver a delicate crunch with a tender middle, and they hold their shape for days when stored well. The pastel swirls look fancy, yet they’re created with a quick trick using gel food coloring and a piping bag.
You can customize the flavors and colors to match any celebration, from baby showers to spring brunches.
Recipe Card
Pastel Swirl Meringue Kisses
Ingredients
- 4 large egg whites, at room temperature
- 1 cup (200 g) granulated sugar, superfine if possible
- 1/4 teaspoon cream of tartar (or 1 teaspoon lemon juice)
- 1 teaspoon pure vanilla extract (or almond, rose, or lemon)
- Gel food coloring in 2–3 pastel shades
- Pinch of fine salt
- Piping bag fitted with a star or round tip (such as Wilton 1M or 2A)
- Two baking sheets lined with parchment paper
Instructions
- Prep the oven and pan: Preheat your oven to 225°F (110°C). Line two baking sheets with parchment paper. Make sure your mixing bowl and whisk are squeaky clean and dry. Any grease will prevent the meringue from whipping properly.
- Warm the sugar (optional but helpful): Spread the sugar on a baking sheet and warm it in the oven for about 5 minutes. Warm sugar dissolves faster, leading to a smoother, glossier meringue. Don’t let it melt or brown.
- Start the meringue: Add the egg whites, cream of tartar, and salt to a stand mixer bowl. Whip on medium speed until soft peaks form and the mixture looks foamy and opaque, about 2–3 minutes.
- Add sugar gradually: Increase to medium-high speed and slowly sprinkle in the warm sugar, 1–2 tablespoons at a time. Take your time. This helps the sugar dissolve and prevents weeping later.
- Whip to stiff, glossy peaks: Continue beating until the meringue is thick, shiny, and holds stiff peaks that stand straight up. Rub a tiny bit between your fingers; it should feel mostly smooth, not gritty. This can take 5–8 minutes total.
- Add flavor: Beat in the vanilla just until blended. Avoid overmixing at this stage to keep the meringue stable.
- Prepare the colored swirls: Turn a piping bag inside out halfway over your hand or a tall glass. Use a clean food-safe brush or toothpick to paint thin vertical lines of gel food coloring inside the bag—2 to 4 stripes, spaced evenly. Less is more for a soft pastel effect.
- Fill the bag: Spoon the meringue into the bag carefully, trying not to smear the colors too much. Twist the top to seal and push the meringue down to the tip.
- Pipe the kisses: Hold the bag straight up, about half an inch above the parchment. Squeeze to form a small mound (about 1 to 1.5 inches wide), then stop pressure and flick your wrist up to create a neat point. Leave a little space between each one for airflow.
- Bake low and slow: Place both trays in the oven and bake for 60–75 minutes, rotating trays halfway through. The kisses should feel dry to the touch and lift cleanly from the parchment. They should not brown.
- Dry in the oven: Turn off the oven and leave the meringues inside with the door closed for another 30–60 minutes. This gradual cool-down helps prevent cracks and tackiness, especially in humid climates.
- Cool completely: Remove and let them cool fully on the trays before transferring. They should be crisp on the outside and slightly chewy in the center.
Keeping It Fresh
Store the meringue kisses in an airtight container at room temperature for up to 2 weeks.
Moisture is their enemy, so avoid humid areas and don’t refrigerate them. If your kitchen is damp, add a small food-safe desiccant pack or a bit of uncooked rice in a sachet to the container. For longer storage, you can freeze them in a sealed container for up to a month.
Thaw at room temperature in the closed container to prevent condensation.
Health Benefits
Meringue kisses are naturally gluten-free and contain no butter or oil. Each one is fairly low in calories due to their light, airy structure. You’re mostly looking at egg whites and sugar, so there’s no cholesterol from egg yolks.
They make a nice option for people avoiding dairy or heavy desserts. That said, they’re still high in sugar, so enjoy them in moderation or pair a few with fresh fruit for balance.
Common Mistakes to Avoid
- Greasy bowl or tools: Even a tiny amount of fat blocks the whites from whipping. Wipe bowls and whisks with vinegar and dry well.
- Adding sugar too fast: Dumping it in can deflate the whites and cause gritty texture.
Sprinkle it in slowly.
- Under-whipped meringue: Soft peaks won’t hold shape and may spread. Whip to firm, glossy peaks.
- High oven temperature: Too hot leads to browning and cracks. Keep it low and steady.
- Humidity: Damp air makes meringues sticky.
Bake on dry days if possible, and cool in the oven.
- Liquid food coloring: It can water down the meringue. Use gel colors for clean swirls.
- Overmixing at the end: After peaks form, be gentle with flavoring and filling the bag to avoid breaking the structure.
Variations You Can Try
- Flavor swaps: Use almond, lemon, peppermint, or rose extract instead of vanilla. Start with 1/4 to 1/2 teaspoon for strong extracts like peppermint.
- Two-tone swirls: Paint two pastel stripes—like blush pink and lavender—on opposite sides of the bag for a soft blended look.
- Confetti sparkle: Sprinkle a little sanding sugar or edible glitter on top before baking for a festive shimmer.
- Chocolate-dipped: After cooling, dip the bases in melted dark or white chocolate and let set on parchment.
- Citrus zest: Fold in very fine lemon or orange zest right before piping for a bright aroma and tiny specks of color.
- Mini pavlovas: Pipe larger rounds with a small well in the center and bake a bit longer.
Fill with whipped cream and berries just before serving.
FAQ
Why are my meringue kisses sticky?
Stickiness usually comes from humidity or underbaking. Extend the bake by 10–15 minutes, then cool in the turned-off oven. Store them airtight once fully cool.
Can I use a hand mixer instead of a stand mixer?
Yes.
A hand mixer works well, but it may take a little longer to reach stiff peaks. Keep the speed moderate and be patient during the sugar addition.
Do I really need cream of tartar?
It helps stabilize the egg whites, making them less likely to collapse. If you don’t have it, use lemon juice or white vinegar.
The result will still be great.
How do I know when they’re done?
They should lift cleanly from the parchment and feel dry to the touch. If the bottoms stick or feel tacky, bake a bit longer and cool in the oven.
Can I make them ahead for a party?
Absolutely. Bake them up to a week ahead and store airtight.
Add any chocolate dipping or decorations closer to the event for best texture.
What if I only have liquid food coloring?
Use a tiny amount and add it to a small portion of the meringue, then marble it gently with the plain batch. Avoid overmixing to keep the batter stiff.
Why did my kisses crack?
Cracking often comes from high heat or quick temperature changes. Bake at low heat and let them cool slowly in the oven after turning it off.
Can I reduce the sugar?
Not by much.
Sugar provides structure and stability. If you cut it too far, the meringue may weep or collapse. Aim for small reductions only and expect a softer texture.
In Conclusion
Pastel swirl meringue kisses are the kind of treat that look fancy without a fussy process.
With a few simple techniques—clean tools, slow sugar addition, low heat—you’ll get glossy peaks and crisp, beautiful results. Customize the colors, try new flavors, and make a batch whenever you need something sweet, light, and eye-catching. They’re small, cheerful bites that bring a touch of celebration to any day.