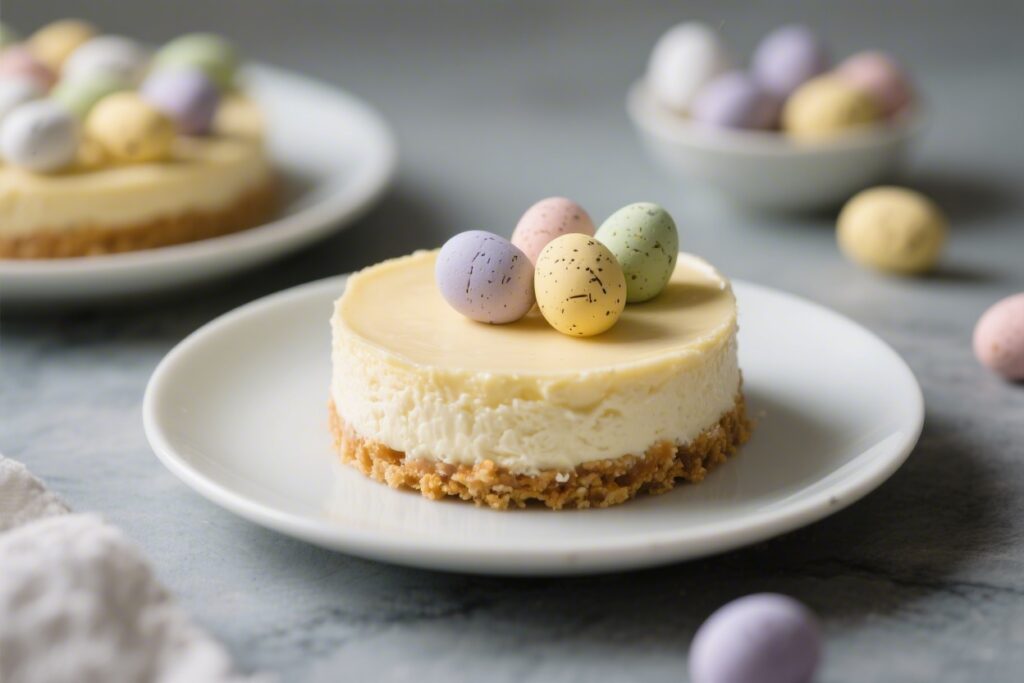
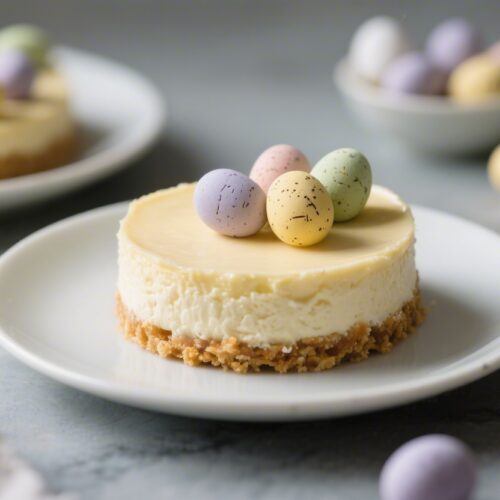
This Mini Egg Easter Cheesecake is the kind of dessert that makes everyone smile before the first bite. It’s creamy, colorful, and surprisingly easy to put together, even if you don’t bake often. The base is buttery and crisp, the filling is smooth and tangy, and the crushed mini eggs add that playful crunch.
Make it the day before, chill it overnight, and you’ll have a standout centerpiece ready for Easter brunch or a family get-together.
What Makes This Special
This cheesecake is no-bake, so there’s no worrying about water baths, cracks, or overbaking. It’s light yet rich, thanks to a balance of cream cheese, whipped cream, and a touch of lemon. The crushed mini eggs add a gentle chocolate crunch throughout the filling, while whole eggs on top make it look extra festive.
It’s the perfect mix of classic cheesecake flavor and seasonal fun.
Recipe Card
Mini Egg Easter Cheesecake
Ingredients
For the crust:
- Digestive biscuits or graham crackers (about 250 g / 9 oz)
- Unsalted butter, melted (110 g / 1/2 cup)
- Pinch of salt
For the filling:
- Full-fat cream cheese, room temperature (600 g / 21 oz)
- Granulated sugar (120 g / 1/2 cup)
- Vanilla extract (2 teaspoons)
- Lemon zest (from 1 lemon)
- Lemon juice (1 tablespoon)
- Heavy or double cream, cold (360 ml / 1 1/2 cups)
- Powdered sugar (2–3 tablespoons, to taste)
- Mini chocolate eggs, roughly crushed (200 g / 7 oz), plus extra for topping
- Pinch of salt
- Unflavored gelatin (1 1/2 teaspoons) or powdered gelatin substitute, optional for extra set
- Cold water (3 tablespoons, if using gelatin)
For topping:
- More mini chocolate eggs (whole and crushed)
- Chocolate sauce or melted chocolate, optional
- Whipped cream, optional
Equipment:
- 8- or 9-inch springform pan
- Electric mixer
- Mixing bowls
- Spatula
- Rolling pin or food processor
Instructions
- Prep the pan. Line the base of an 8- or 9-inch springform pan with parchment. Lightly grease the sides to help with clean release.
- Make the crust. Crush the biscuits or crackers to fine crumbs using a food processor or a bag and rolling pin. Stir in the melted butter and a pinch of salt until the mixture feels like wet sand.
- Press and chill. Tip the crumbs into the pan and press firmly into an even layer, going slightly up the sides if you like. Use the bottom of a glass to compact. Chill for 20 minutes.
- Bloom gelatin (optional). If you want a firmer set, sprinkle gelatin over cold water and let it sit 5 minutes. Gently warm until dissolved and clear, then cool to room temperature.
- Beat the cream cheese. In a large bowl, beat cream cheese, granulated sugar, vanilla, lemon zest, lemon juice, and a pinch of salt until smooth and fluffy. Scrape the bowl so there are no lumps.
- Whip the cream. In a separate bowl, whip cold heavy cream with powdered sugar to medium-stiff peaks. It should hold lines but look silky, not grainy.
- Combine. Fold one-third of the whipped cream into the cream cheese to lighten, then gently fold in the rest until no streaks remain.
- Add gelatin (if using). Drizzle the cooled gelatin into the mixture while folding to distribute evenly.
- Fold in mini eggs. Gently fold in the crushed mini eggs so they’re evenly scattered but not broken down completely.
- Fill the pan. Spoon the filling over the chilled crust. Smooth the top with an offset spatula. Tap the pan lightly to release air pockets.
- Chill. Cover and refrigerate at least 6 hours, but overnight is best for clean slices and full flavor.
- Decorate. Release the cheesecake from the pan. Top with whole mini eggs, extra crushed pieces, and a drizzle of chocolate sauce if you like. Whipped cream swirls add a bakery finish.
- Slice and serve. For neat slices, warm a sharp knife under hot water, wipe dry, and cut. Repeat between slices.
Storage Instructions
Keep the cheesecake covered in the fridge for up to 4 days. If you’ve added whipped cream on top, it’s best within 48 hours. For longer storage, freeze slices on a tray until firm, then wrap well and freeze for up to 1 month.
Thaw in the fridge overnight. Add fresh toppings after thawing to keep them crisp and colorful.
Health Benefits
- Protein and calcium: Cream cheese and cream contribute some protein and calcium, which support bones and muscles.
- Portion control: A rich dessert encourages smaller slices to satisfy a sweet craving without overdoing it.
- Balanced flavors: The lemon zest and juice brighten the richness, so you may feel satisfied with less.
- Mindful ingredients: Using good-quality chocolate and real vanilla makes the treat feel special, reducing the urge to go back for more.
This is still a dessert, so enjoy it as part of a balanced approach. Pair a slice with berries or a cup of tea for a satisfying finish to a meal.
What Not to Do
- Don’t skip chilling time. Cutting too soon leads to messy slices and a soft center.
- Don’t overwhip the cream. Overwhipped cream turns grainy and can make the filling dense.
- Don’t use low-fat cream cheese.</-strong> It tends to be watery and won’t set as well.
Use full-fat for the best texture.
- Don’t crush the mini eggs to dust. You want visible chunks for texture and color.
- Don’t add warm gelatin. If using gelatin, make sure it’s cooled before mixing or it can clump.
Recipe Variations
- Chocolate swirl: Fold in ribbons of cooled melted chocolate or chocolate hazelnut spread for a marbled look.
- Strawberry twist: Add a thin layer of strawberry compote over the crust before the filling, or top with fresh berries.
- Cookie crust swap: Use chocolate sandwich cookies (filling included) or shortbread for a different flavor profile.
- Mini cheesecakes: Press crust into lined muffin tins, add filling, and chill. Great for parties and easy serving.
- Citrus-forward: Increase lemon zest and add a little orange zest for a brighter, springy flavor.
- Gluten-free: Use gluten-free biscuits for the crust and check the mini eggs label.
FAQ
Can I make this without gelatin?
Yes. The cheesecake will still set from the whipped cream and cream cheese, especially if you chill it overnight.
Gelatin just adds extra stability for very clean slices or warmer rooms.
How do I crush mini eggs without shattering them everywhere?
Place them in a zip-top bag and use a rolling pin to gently tap, not smash. Aim for a mix of halves and small chunks, not crumbs. You can also pulse a few times in a food processor, watching closely.
What size pan works best?
An 8-inch springform makes a taller cheesecake, while a 9-inch gives a slightly thinner one.
Both work well; just keep to the same chilling time.
Can I reduce the sugar?
Yes. You can cut the granulated sugar in the filling by about 20% without affecting texture. Taste as you go, and remember the mini eggs add sweetness too.
Why is my cheesecake lumpy?
Lumps usually mean the cream cheese wasn’t fully softened.
Beat the cream cheese thoroughly before adding cream, and always scrape the bowl. If needed, press the mixture through a fine sieve before folding in the whipped cream.
How far ahead can I make it?
Up to two days in advance is ideal. Add final decorations the day you serve so the colors stay bright and the topping stays crisp.
Can I use different Easter candies?
Absolutely.
Candy-coated chocolates, chopped malted eggs, or small chocolate bunnies work. Keep pieces small and fold them in gently to protect the creamy texture.
In Conclusion
This Mini Egg Easter Cheesecake brings together creamy, tangy filling, a buttery base, and festive crunch in every slice. It’s simple to make, looks great on the table, and holds up well in the fridge.
Whether you’re hosting a crowd or keeping it low-key, this cheerful dessert feels special without the stress. Make it ahead, slice it clean, and enjoy a sweet moment of spring.