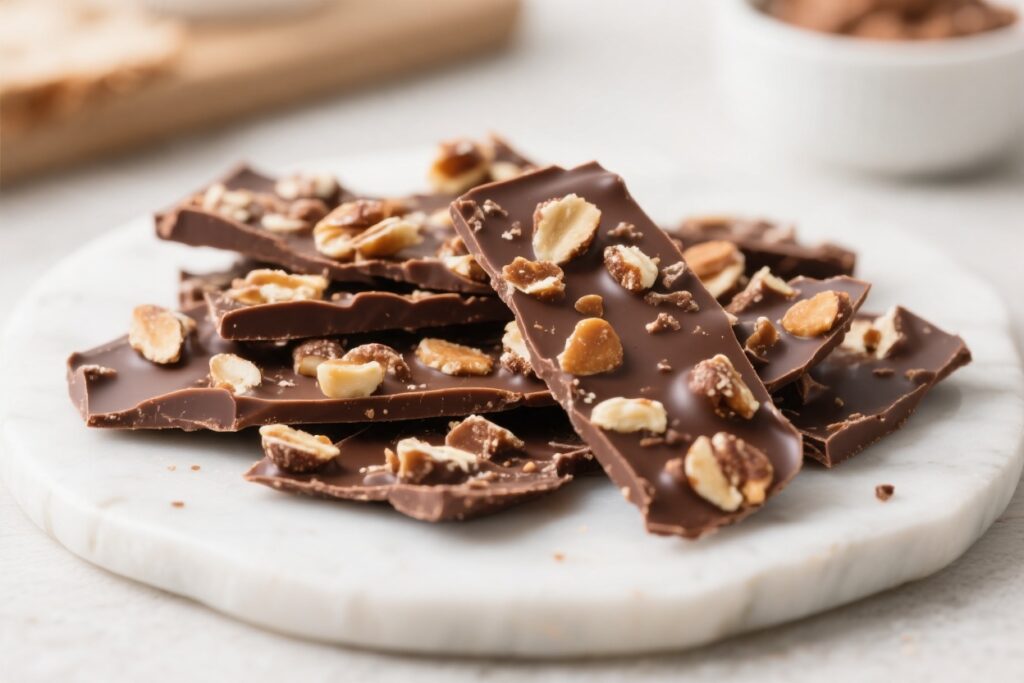
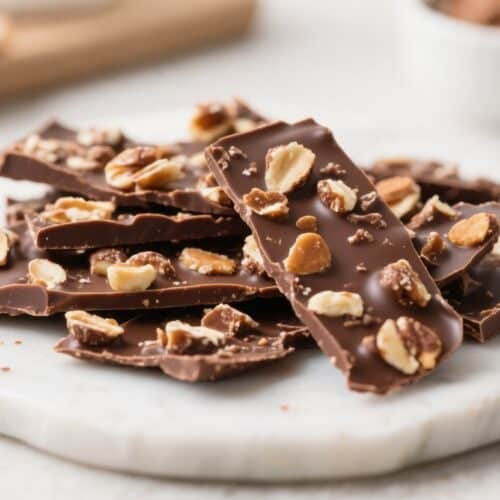
Chocolate bark is one of those sweets that feels fancy but takes almost no effort. Five ingredients, one pan, and a little chill time—that’s it. You don’t need special tools or candy-making skills, just a good chocolate base and toppings you love.
It’s perfect for gifting, last-minute parties, or when you just want a crunchy, chocolatey treat. You can make it look impressive with swirls and colors, or keep it rustic and simple. Either way, it tastes great and comes together fast.
Why This Recipe Works
This chocolate bark keeps things focused: quality chocolate, contrasting textures, and a touch of salt.
The method is straightforward, so you get clean snaps and glossy pieces without fuss. Using only five ingredients means each one matters, and they all work together to create balance—sweet, salty, creamy, and crunchy. Plus, the process is forgiving.
Even if you’re new to candy making, this recipe delivers reliable results.
Storage Instructions
Store the chocolate bark in an airtight container at cool room temperature for up to 1 week. If your kitchen runs warm, keep it in the fridge to prevent melting and bloom.
Separate layers with parchment to avoid sticking. For longer storage, freeze for up to 2 months. Thaw in the fridge to help prevent condensation on the chocolate surface.
Benefits of This Recipe
- Fast and simple: Minimal steps, no special tools, and ready to eat in under an hour.
- Customizable: Swap toppings to match the season, your pantry, or flavor preferences.
- Great for gifting: Break into pieces, bag them up, and you’ve got a thoughtful homemade treat.
- Balanced flavors: Sweet chocolate, tart fruit, crunchy nuts, and a hit of salt keep each bite interesting.
- Kid-friendly project: Safe, hands-on steps like sprinkling toppings and swirling chocolate.
Common Mistakes to Avoid
- Overheating the chocolate: High heat scorches chocolate fast.
Use short bursts and stir often for smooth melting.
- Wet tools or bowls: Even a drop of water can cause chocolate to seize. Keep everything completely dry.
- Thick layers: If the base is too thick, the bark won’t snap cleanly. Aim for about 1/4 inch.
- Overloading toppings: Too many add-ins can cause pieces to fall off.
Sprinkle evenly and press gently.
- Skipping the salt or using table salt: Flaky sea salt adds texture and subtle salinity. Fine salt can taste harsh.
Alternatives
- Chocolate base: Try milk, dark, or semi-sweet. For extra depth, use a mix.
If you like less sweetness, choose 70% cacao.
- Topping swaps: Pretzels, crushed cookies, coconut flakes, pumpkin seeds, candied ginger, or espresso beans all work well.
- Allergen-friendly: Use allergy-safe chocolate, swap nuts for seeds (sunflower, pumpkin), and choose dried fruit without added sulfites if needed.
- Flavor twists: Add a pinch of cinnamon, cardamom, or chili powder to the melted chocolate. A few drops of peppermint extract gives a holiday vibe.
- No white chocolate: Skip the swirl and just use one type of chocolate, or drizzle a bit of the base chocolate for texture.
Quick 5 Ingredient Chocolate Bark – Simple, Fast, and Crowd-Pleasing
Ingredients
- Chocolate (12 ounces total): Use good-quality dark, milk, or semi-sweet chocolate chips or chopped bars.
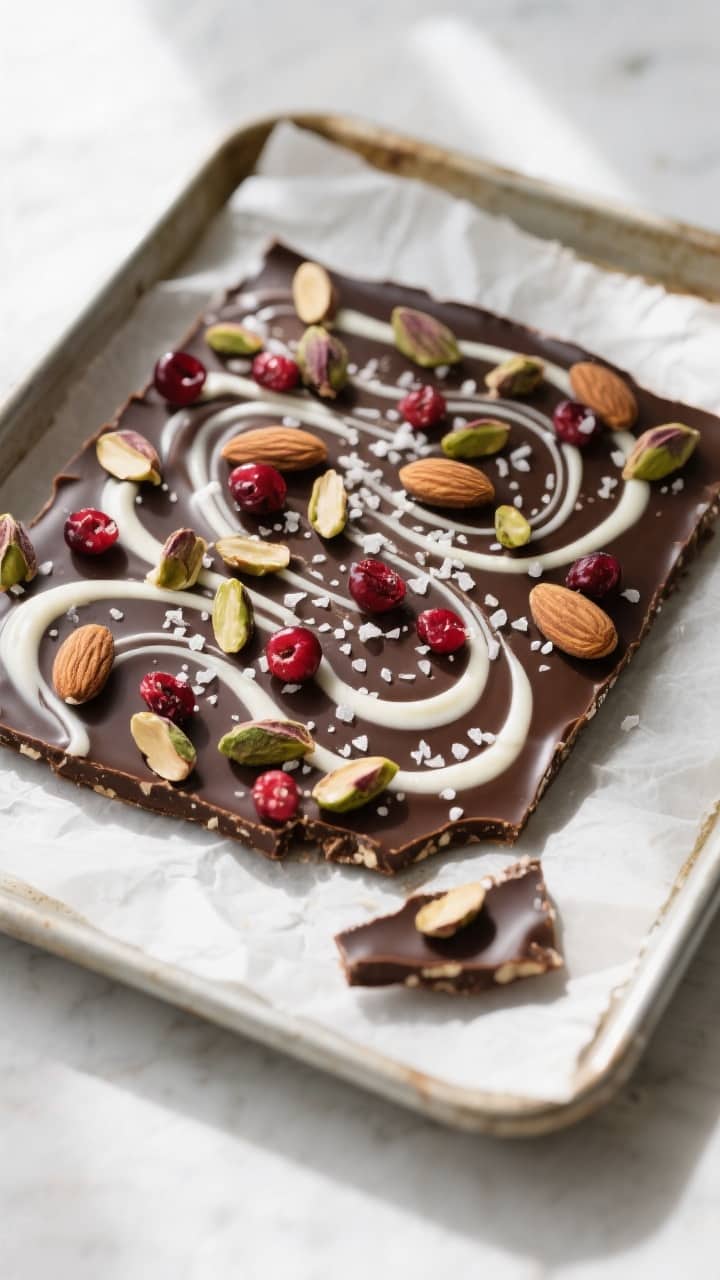
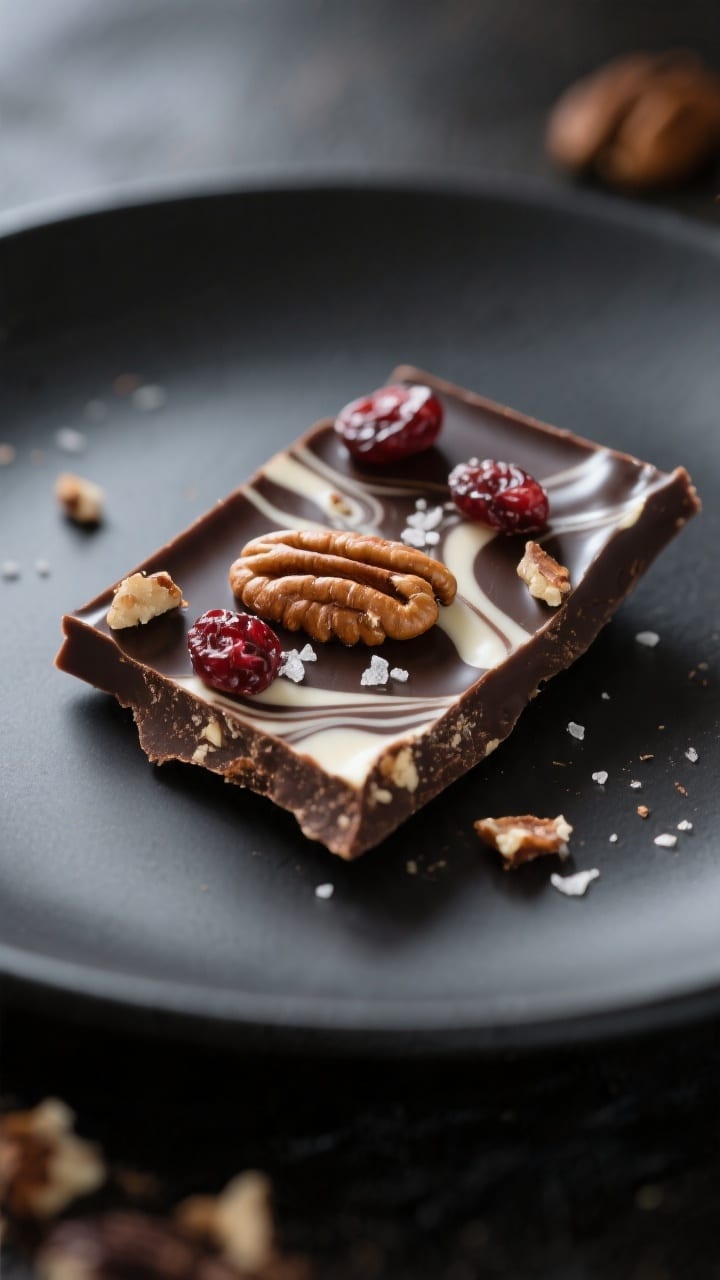
- White chocolate (4 ounces): Optional for swirling, but adds great contrast.
- Nuts (1/2 cup): Almonds, pistachios, pecans, or walnuts, roughly chopped.
- Dried fruit (1/3 cup): Cranberries, cherries, apricots, or raisins for a chewy, sweet bite.
- Flaky sea salt (a generous pinch): Brings out flavor and adds a delicate crunch.
Instructions
- Prep your pan: Line a rimmed baking sheet (about 9×13 inches) with parchment paper. Make sure the paper overhangs the sides so you can lift the bark out easily later.
- Toast the nuts (optional but recommended): Spread nuts on a dry skillet over medium heat for 3–5 minutes, stirring until fragrant. Let cool, then roughly chop.This deepens flavor and improves crunch.
- Melt the main chocolate: Place the 12 ounces of chocolate in a microwave-safe bowl. Heat in 20–30 second bursts, stirring between each, until smooth. Or use a double boiler over gently simmering water, stirring frequently.
- Stir in boosters: If using, add 1 teaspoon oil and 1 teaspoon vanilla to the melted chocolate.Mix until glossy and fluid.
- Spread the base: Pour the melted chocolate onto the lined pan. Use an offset spatula or back of a spoon to spread it into an even layer, about 1/4 inch thick.
- Melt the white chocolate: In a separate bowl, melt the 4 ounces of white chocolate using the same short-burst method. Stir until smooth.
- Create the swirl: Spoon small dollops of melted white chocolate across the dark base.Drag a toothpick or skewer through the dollops to create gentle swirls. Don’t overmix or you’ll lose the pattern.
- Add toppings: Sprinkle the chopped nuts and dried fruit evenly over the surface. Gently press them in so they adhere to the chocolate.
- Finish with salt: Lightly sprinkle flaky sea salt over the top.A little goes a long way, so start small.
- Set the bark: Refrigerate for 20–30 minutes, or let it set at cool room temperature for 1–2 hours, until completely firm.
- Break into pieces: Lift the bark using the parchment edges and place it on a cutting board. Break into rustic shards with your hands or slice into squares with a sharp knife.
- Serve or store: Enjoy right away or follow the storage instructions below to keep it fresh.
FAQ
Can I use chocolate chips instead of bars?
Yes. Chocolate chips melt a bit thicker because they’re designed to hold shape, but they work fine for bark.
If the melted chocolate seems too stiff, stir in a teaspoon of neutral oil to loosen it.
How do I prevent the toppings from falling off?
Press them lightly into the warm chocolate right after sprinkling. Don’t wait too long, or the surface will set and the toppings won’t adhere.
Do I need to temper the chocolate?
Not for this quick version. Tempering gives shine and a firm snap at room temperature, but it adds steps.
If you’re gifting and want that polished finish, tempering is a nice upgrade. Otherwise, chilling sets it well enough.
What’s the best way to cut the bark neatly?
For clean lines, let it set completely, then score with a sharp knife and press down firmly. A warm knife (briefly dipped in hot water and dried) can help slice through nuts without cracking the whole sheet.
Can I make this sugar-free?
Use a no-sugar-added chocolate you enjoy and choose unsweetened dried fruit or swap fruit for nuts and seeds.
The texture will be the same, though the flavor will be less sweet.
How thick should I spread the chocolate?
Aim for about 1/4 inch. Thinner can get fragile; thicker becomes hard to bite and may not set evenly with toppings.
Why did my chocolate look streaky or dull after chilling?
Rapid temperature changes or moisture can cause bloom (fat or sugar rising to the surface). It’s still safe to eat.
Next time, make sure tools are dry and let it set in a cool room or chill briefly, then store airtight.
What size pan should I use?
A quarter sheet pan (roughly 9×13 inches) is ideal. For thicker bark, use a smaller pan; for thinner, spread on a larger pan. Adjust thickness more than pan size when possible.
Can I double the recipe?
Absolutely.
Use a full sheet pan or make two quarter sheets. Melt chocolate in batches to avoid overheating a large amount at once.
What’s the best chocolate percentage?
Between 55% and 70% cacao is a sweet spot for most people. If you love bittersweet, go higher.
Just pair it with fruit or a touch more white chocolate to balance the bitterness.
Wrapping Up
Quick 5 Ingredient Chocolate Bark is proof that simple can be special. With a handful of pantry staples and a few easy steps, you get a treat that looks impressive and tastes even better. Mix and match toppings, keep a batch on hand for cravings, or wrap some up for friends.
Once you make it, you’ll have a go-to recipe for any season, any occasion, and any sweet tooth moment.