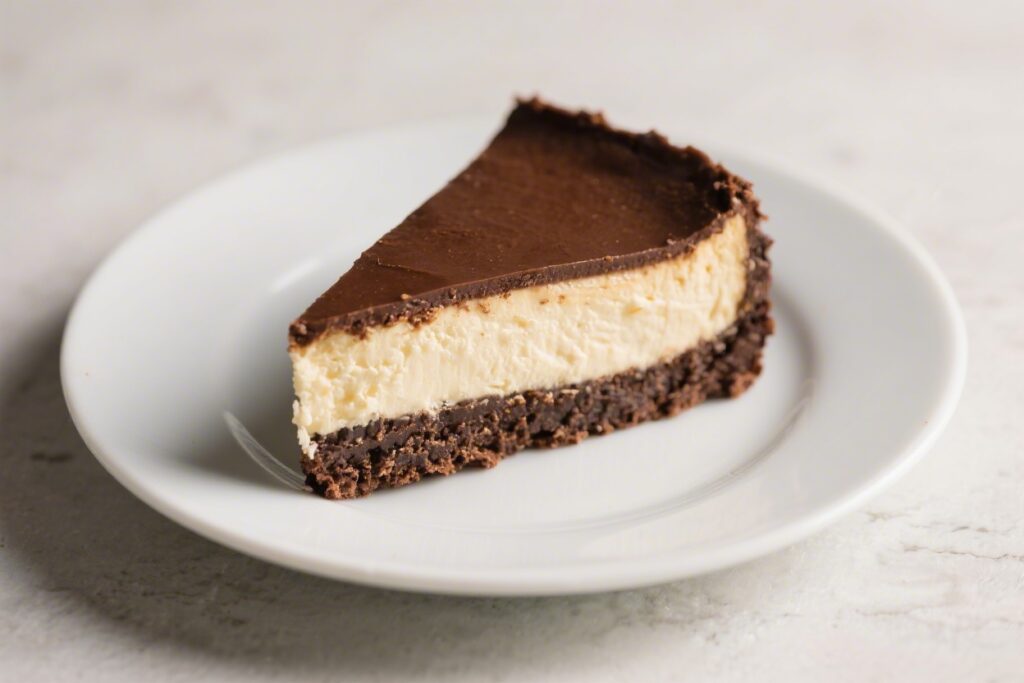
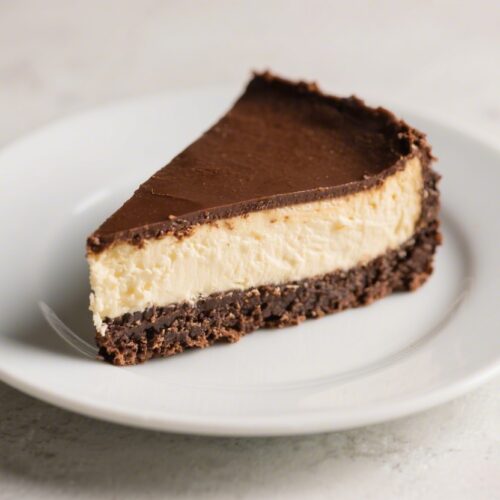
There’s something irresistible about a dessert that gives you the best of two worlds. Brownie bottom cheesecake does exactly that, stacking a fudgy brownie base with a silky, tangy cheesecake on top. It looks impressive, tastes luxurious, and comes together with simple ingredients.
This is the kind of dessert that wins potlucks, birthday parties, and quiet nights in. If you love chocolate and creamy textures, this one belongs in your recipe rotation.
What Makes This Special
This dessert blends two classic favorites into one bite: a rich brownie and a smooth cheesecake. The textures play beautifully—chewy and fudgy on the bottom, velvety and cool on top.
It’s also flexible: you can use a boxed brownie mix or a homemade version, and adjust the cheesecake with flavor add-ins. Best of all, it slices neatly and serves like a dream, making it perfect for hosting or gifting.
Recipe Card
Brownie Bottom Cheesecake
Ingredients
For the Brownie Layer:
- 1 box brownie mix (18–20 oz) plus eggs, oil, and water as directed, or:
- 1/2 cup unsalted butter
- 1 cup granulated sugar
- 2 large eggs
- 1 teaspoon vanilla extract
- 1/3 cup unsweetened cocoa powder
- 1/2 cup all-purpose flour
- 1/4 teaspoon salt
- 1/4 teaspoon baking powder
For the Cheesecake Layer:
- 24 oz cream cheese, softened (three 8-oz blocks)
- 3/4 cup granulated sugar
- 2 large eggs, room temperature
- 1/2 cup sour cream
- 1 teaspoon vanilla extract
- 1 tablespoon cornstarch or 2 teaspoons flour (optional, for stability)
- Pinch of salt
Optional Toppings:
- Chocolate ganache or fudge sauce
- Fresh berries
- Whipped cream
- Chocolate curls or chopped nuts
Equipment:
- 9-inch springform pan (or 9-inch square pan with high sides)
- Mixing bowls and hand mixer or stand mixer
- Parchment paper
Instructions
- Prep the pan and oven. Heat oven to 325°F (163°C). Line the bottom of a 9-inch springform pan with parchment and lightly grease the sides. This helps prevent sticking and makes for clean slices.
- Make the brownie batter. If using a mix, prepare as directed. For homemade, melt butter, whisk in sugar, eggs, and vanilla. Sift in cocoa, flour, salt, and baking powder. Stir until just combined. Do not overmix.
- Bake the brownie base. Spread brownie batter evenly in the pan. Bake for 15–20 minutes, until the top looks set but still slightly underbaked in the center. It will finish cooking under the cheesecake.
- Lower the temperature if needed. Keep the oven at 325°F or drop to 300°F if your oven runs hot. Cheesecake likes gentle heat for a smooth texture.
- Beat the cream cheese. In a clean bowl, beat softened cream cheese on medium speed until smooth and fluffy, 1–2 minutes. Scrape the bowl to avoid lumps.
- Add sugar and salt. Mix in sugar and a pinch of salt until silky. This step helps dissolve the sugar and create a creamy base.
- Blend in eggs, one at a time. Mix on low speed just until incorporated. Overbeating adds air, which can lead to cracks.
- Add sour cream, vanilla, and cornstarch. Stir until smooth. The sour cream adds tang and a luscious texture; cornstarch adds extra stability for cleaner slices.
- Assemble. Pour the cheesecake batter over the warm brownie base. Smooth the top with an offset spatula. Tap the pan gently to release air bubbles.
- Bake gently. Bake 35–45 minutes, until the edges are set and the center wobbles slightly like Jell-O. Do not overbake. Residual heat will finish the job.
- Cool slowly. Turn off the oven, crack the door, and let the cheesecake rest for 30 minutes. Then cool to room temperature on a rack. This gradual cool helps prevent cracks.
- Chill. Refrigerate at least 4 hours, ideally overnight. This sets the cheesecake and makes slicing easier.
- Add toppings and serve. Run a thin knife around the edge before releasing the springform. Top with ganache, whipped cream, or berries. Slice with a hot, clean knife for neat edges.
Keeping It Fresh
Store the cheesecake covered in the fridge for up to 5 days.
A cake keeper or an inverted bowl works well to protect it from fridge odors. For longer storage, freeze individual slices on a baking sheet until firm, then wrap tightly. Thaw overnight in the fridge or at room temperature for 30–45 minutes before serving.
Health Benefits
This dessert is an indulgence, but there are still a few things to appreciate. Cream cheese and eggs provide protein and calcium, which support bones and satiety.
Cocoa offers flavanols with antioxidant properties, especially if you use a good-quality dark cocoa. You can also make small adjustments—use reduced-fat cream cheese, swap part of the sugar for less, or serve smaller slices—to fit your goals.
Common Mistakes to Avoid
- Overbaking the brownie base. If it’s fully baked before adding cheesecake, the bottom can turn dry or hard. Slightly underbaked is best.
- Cold cream cheese. This leads to lumps.
Make sure it’s fully softened at room temperature.
- Overmixing the cheesecake. Too much air causes cracks. Mix on low and stop when incorporated.
- Skipping the cool-down. Rapid temperature changes can split the top. Let it rest in the oven, then on the counter, then chill.
- Slicing too soon. The cheesecake needs time to set.
Chilling overnight gives the cleanest slices and best texture.
Variations You Can Try
- Mocha Swirl: Add 1 teaspoon espresso powder to the brownie and swirl 2 tablespoons cooled coffee into the cheesecake batter.
- Peanut Butter Ribbon: Warm 1/3 cup peanut butter and dollop over the cheesecake layer. Swirl with a knife before baking.
- Mint Chocolate: Stir 1/2 teaspoon peppermint extract into the cheesecake and top with crushed mint candies after chilling.
- Raspberry Cheesecake: Dot the top with small spoonfuls of raspberry jam and swirl. Serve with fresh raspberries.
- Oreo Crunch: Fold 1 cup crushed chocolate sandwich cookies into the cheesecake batter and sprinkle more on top after chilling.
- Gluten-Free: Use a gluten-free brownie mix and substitute cornstarch for the flour in the cheesecake.
FAQ
Can I use a boxed brownie mix?
Yes.
It’s convenient and works very well. Prepare as directed on the box, but bake only until slightly set before adding the cheesecake layer.
Do I need a water bath?
No. Because the cheesecake layer is thinner than a classic cheesecake, a water bath isn’t necessary.
A gentle oven temperature and slow cooling prevent most cracks.
How do I know when it’s done?
The edges will be set while the center still jiggles slightly when you nudge the pan. If the top looks dry or puffy, it’s likely overbaked.
Can I make it ahead?
Absolutely. This dessert is best made the day before you plan to serve it.
The flavors meld and the texture sets beautifully overnight.
What if my cheesecake cracks?
It’ll still taste great. Cover with ganache, whipped cream, or fruit. Next time, avoid overmixing and cool it gradually to minimize cracking.
Can I use a regular cake pan?
Yes, a 9-inch cake pan with high sides works.
Line it well with parchment, leaving an overhang to lift the cake out, or serve straight from the pan.
How do I get clean slices?
Use a sharp knife dipped in hot water and wiped dry between cuts. Chilling the cheesecake fully is key for sharp, tidy slices.
Can I reduce the sugar?
Yes, you can cut 2–3 tablespoons from the cheesecake layer without affecting texture much. For the brownie, reduce up to 1/4 cup, keeping in mind it may be less fudgy.
What toppings pair best?
Chocolate ganache, raspberry sauce, fresh berries, caramel drizzle, or lightly sweetened whipped cream all complement the rich layers nicely.
Is it safe to freeze?
Yes.
Wrap slices tightly after a quick freeze, then store up to 2 months. Thaw in the fridge for best texture.
Final Thoughts
Brownie bottom cheesecake delivers big flavor with a simple process and everyday ingredients. It’s the kind of dessert that feels special without being fussy.
Once you master the gentle bake and chill, it becomes a reliable showstopper for any occasion. Keep this recipe on hand, and don’t be surprised when it becomes your most requested treat.