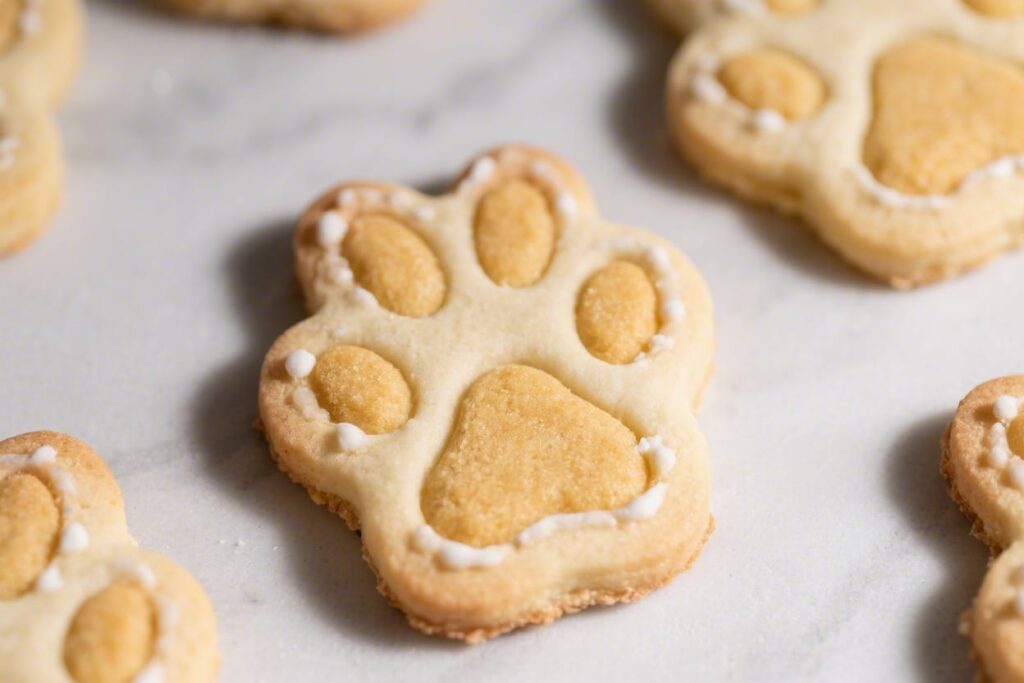
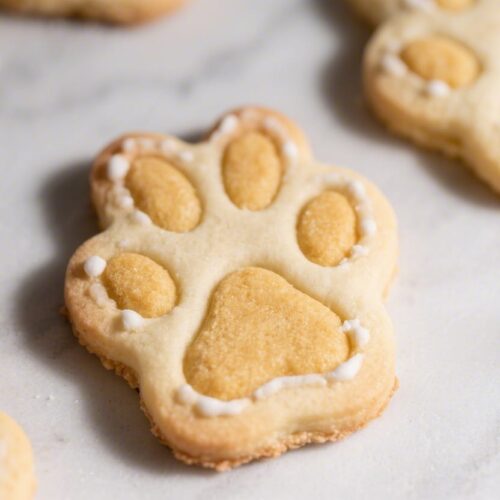
These Bunny Paw Print Sugar Cookies bring a little whimsy to any spring gathering, bake sale, or rainy-day activity. They’re soft, buttery, and hold their shape beautifully, so the paw print design stays crisp after baking. Kids love helping with the “toe beans,” and adults appreciate how simple the dough is to work with.
Whether you’re planning an Easter dessert table or just want something sweet and cheerful, these cookies deliver. They look adorable, taste great, and come together with pantry basics you probably already have.
Bunny Paw Print Sugar Cookies
Ingredients
For the cookies:
- 2 3/4 cups 330 g all-purpose flour
- 1/2 teaspoon baking powder
- 1/2 teaspoon fine salt
- 1 cup 227 g unsalted butter, softened
- 1 cup 200 g granulated sugar
- 1 large egg room temperature
- 2 teaspoons pure vanilla extract
- 1 tablespoon milk or cream optional, for softer dough
For decorating the paw prints:
- Small round candies like pink M&M’s or candy-coated chocolate for the “toe beans”
- Mini marshmallows optional cut in half for the “pads,” or pink royal icing
- Pink sanding sugar optional, for sparkle
- Royal icing or a simple glaze powdered sugar + milk to attach decorations
- Food coloring gel in pink if tinting icing
Tools:
- Large round cookie cutter about 2.5–3 inches for the paw base
- Small round cutter or bottle cap about 3/4 inch for the heel pad indent
- Even smaller round tool piping tip end, straw, or 1/2-inch cutter for the toes
- Rolling pin baking sheets, parchment paper
Instructions
- Prep your space: Preheat the oven to 350°F (175°C). Line two baking sheets with parchment paper. Set out your cutters and decorations.
- Mix dry ingredients: In a bowl, whisk the flour, baking powder, and salt. Set aside.
- Cream butter and sugar: In a large bowl, beat the softened butter and sugar with a hand mixer or stand mixer until light and fluffy, about 2–3 minutes.
- Add egg and vanilla: Beat in the egg and vanilla until fully combined. If the dough seems dry later, you’ll add the milk, but hold off for now.
- Combine wet and dry: Add the dry ingredients to the butter mixture in two additions. Mix on low until a soft dough forms. If it looks crumbly, add up to 1 tablespoon of milk to bring it together.
- Roll the dough: Lightly flour your work surface. Roll the dough to about 1/4 inch thickness. Avoid over-flouring; a little stickiness is okay.
- Cut the paw bases: Use the large round cutter to cut circles. Place them on the prepared baking sheets, spacing them about 2 inches apart.
- Create the paw prints: Use the small round cutter to press a gentle indent near the bottom edge of each circle for the heel pad. Use the smallest round tool to press three smaller indents above it for the toes. Don’t cut through; just make impressions.
- Bake: Bake 9–11 minutes, until the edges look set but not browned. The cookies should remain pale for a soft, tender bite.
- Cool: Let the cookies rest on the baking sheet for 5 minutes, then move them to a wire rack to cool completely.
- Decorate the paws: If using icing, whisk 1 cup powdered sugar with 1–2 tablespoons milk until smooth. Tint pink. Pipe or spoon icing into the heel and toe indents. If using candies or marshmallows, dab a bit of icing as “glue,” then press them into place. Sprinkle with pink sanding sugar if desired.
- Set and serve: Allow icing to set for 30–60 minutes before stacking or packaging.
What Makes This Recipe So Good
- Soft yet sturdy texture: These cookies keep their shape while baking, so the paw prints come out clean and defined.
- No chilling required (optional): The dough is easy to roll right away, but you can chill it for even sharper edges.
- Classic vanilla-butter flavor: Familiar, crowd-pleasing taste that pairs well with frosting or a light dusting of sugar.
- Kid-friendly decorating: The paw print design uses simple tools—nothing more than round cutters and candies or icing.
- Make-ahead friendly: The dough and baked cookies both freeze well, so you can prep ahead for parties or holidays.
What You’ll Need
- For the cookies:
- 2 3/4 cups (330 g) all-purpose flour
- 1/2 teaspoon baking powder
- 1/2 teaspoon fine salt
- 1 cup (227 g) unsalted butter, softened
- 1 cup (200 g) granulated sugar
- 1 large egg, room temperature
- 2 teaspoons pure vanilla extract
- 1 tablespoon milk or cream (optional, for softer dough)
- For decorating the paw prints:
- Small round candies (like pink M&M’s or candy-coated chocolate) for the “toe beans”
- Mini marshmallows (optional) cut in half for the “pads,” or pink royal icing
- Pink sanding sugar (optional, for sparkle)
- Royal icing or a simple glaze (powdered sugar + milk) to attach decorations
- Food coloring gel in pink (if tinting icing)
- Tools:
- Large round cookie cutter (about 2.5–3 inches) for the paw base
- Small round cutter or bottle cap (about 3/4 inch) for the heel pad indent
- Even smaller round tool (piping tip end, straw, or 1/2-inch cutter) for the toes
- Rolling pin, baking sheets, parchment paper
Instructions
- Prep your space: Preheat the oven to 350°F (175°C). Line two baking sheets with parchment paper. Set out your cutters and decorations.
- Mix dry ingredients: In a bowl, whisk the flour, baking powder, and salt. Set aside.
- Cream butter and sugar: In a large bowl, beat the softened butter and sugar with a hand mixer or stand mixer until light and fluffy, about 2–3 minutes.
- Add egg and vanilla: Beat in the egg and vanilla until fully combined. If the dough seems dry later, you’ll add the milk, but hold off for now.
- Combine wet and dry: Add the dry ingredients to the butter mixture in two additions. Mix on low until a soft dough forms. If it looks crumbly, add up to 1 tablespoon of milk to bring it together.
- Roll the dough: Lightly flour your work surface. Roll the dough to about 1/4 inch thickness. Avoid over-flouring; a little stickiness is okay.
- Cut the paw bases: Use the large round cutter to cut circles. Place them on the prepared baking sheets, spacing them about 2 inches apart.
- Create the paw prints: Use the small round cutter to press a gentle indent near the bottom edge of each circle for the heel pad. Use the smallest round tool to press three smaller indents above it for the toes. Don’t cut through; just make impressions.
- Bake: Bake 9–11 minutes, until the edges look set but not browned. The cookies should remain pale for a soft, tender bite.
- Cool: Let the cookies rest on the baking sheet for 5 minutes, then move them to a wire rack to cool completely.
- Decorate the paws: If using icing, whisk 1 cup powdered sugar with 1–2 tablespoons milk until smooth. Tint pink. Pipe or spoon icing into the heel and toe indents. If using candies or marshmallows, dab a bit of icing as “glue,” then press them into place. Sprinkle with pink sanding sugar if desired.
- Set and serve: Allow icing to set for 30–60 minutes before stacking or packaging.
Storage Instructions
- Room temperature: Store in an airtight container for up to 5 days. Separate layers with parchment to protect the decorations.
- Freezing baked cookies: Freeze un-iced cookies for up to 2 months. Thaw at room temperature, then decorate.
- Freezing dough: Wrap the dough tightly in plastic, then in a freezer bag. Freeze up to 2 months. Thaw overnight in the fridge and let it sit at room temperature 10–15 minutes before rolling.
- Royal icing longevity: Iced cookies keep best in a cool, dry place. Avoid humidity to prevent color bleeding.
Benefits of This Recipe
- Beginner-friendly: The dough is forgiving, and the decorations are simple enough for kids to help.
- Customizable look: Use different shades of pink, pastels, or even chocolate for a bunny “muddy paw” effect.
- Scalable: Double the batch for parties, or make a half batch for small gatherings.
- Holiday-ready: Perfect for Easter baskets, classroom treats, or spring brunch dessert boards.
- Minimal special equipment: Round cutters and basic tools are all you need.
What Not to Do
- Don’t overbake: Brown edges lead to a crisp, drier cookie and can distort the paw design. Pull them when they’re just set.
- Don’t skip cooling: Decorating warm cookies melts icing and candies, causing smears and slides.
- Don’t overload flour: Too much flour creates tough cookies. Lightly dust the surface and handle the dough gently.
- Don’t press too hard for indents: Cutting through the dough makes weak spots that can crack during baking.
- Don’t store with strong-smelling foods: Sugar cookies absorb odors easily. Keep them separate from onions, spices, or scented candles.
Alternatives
- Flavor swaps: Replace half the vanilla with almond extract for a bakery-style twist, or add 1 teaspoon lemon zest for a bright, springy note.
- Gluten-free: Use a 1:1 gluten-free flour blend with xanthan gum. Chill the dough 30 minutes to help with rolling.
- Dairy-free: Substitute plant-based butter sticks and a splash of non-dairy milk. Choose dairy-free candies or use tinted icing.
- No-cutter method: Roll dough into balls, flatten slightly, then make indents with your tools. The shape will be more rustic but still adorable.
- Chocolate version: Replace 1/4 cup flour with cocoa powder and add 1 extra tablespoon milk for a chocolate bunny paw cookie.
FAQ
How do I keep the cookies from spreading?
Chilling the cut dough for 15–20 minutes before baking helps a lot. Also, use parchment-lined sheets, measure flour accurately, and avoid over-creaming butter, which can add excess air and cause spread.
Can I make the dough ahead?
Yes.
The dough can be refrigerated up to 3 days or frozen up to 2 months. Bring chilled dough to a workable temperature before rolling so it doesn’t crack.
What if I don’t have round cutters?
Use a drinking glass for the large circles, a bottle cap for the heel indent, and the end of a piping tip or metal straw for the toes. Aim for clear impressions, not deep cuts.
Which icing is best for decorating?
Royal icing gives the cleanest look and sets firm.
A simple powdered sugar glaze works too but stays softer. If packaging for gifts, go with royal icing to avoid smudges.
Can I color the dough instead of using icing?
You can. Knead a small amount of gel food coloring into a portion of the dough and use that colored dough to fill the indents, pressing gently so it adheres.
Bake as usual.
How thick should I roll the dough?
About 1/4 inch is the sweet spot. Thinner cookies brown too quickly and lose their shape; thicker cookies may underbake in the center.
Do I need to use unsalted butter?
Unsalted gives you control over salt levels. If you only have salted butter, reduce the added salt to a pinch and proceed.
What’s the best way to package these for gifts?
Let the icing set fully.
Then place cookies in cellophane bags with a small piece of parchment between stacked cookies. Tie with ribbon and store in a cool, dry place until gifting.
In Conclusion
Bunny Paw Print Sugar Cookies are charming, easy, and perfect for spring. With a simple dough and playful decorations, they’re a hit at parties or a fun weekend bake.
Keep the shapes thick, the bake light, and the decorations simple for the best results. Make a batch ahead, stash some in the freezer, and enjoy a sweet, cheerful treat whenever you want a little hop of happiness.