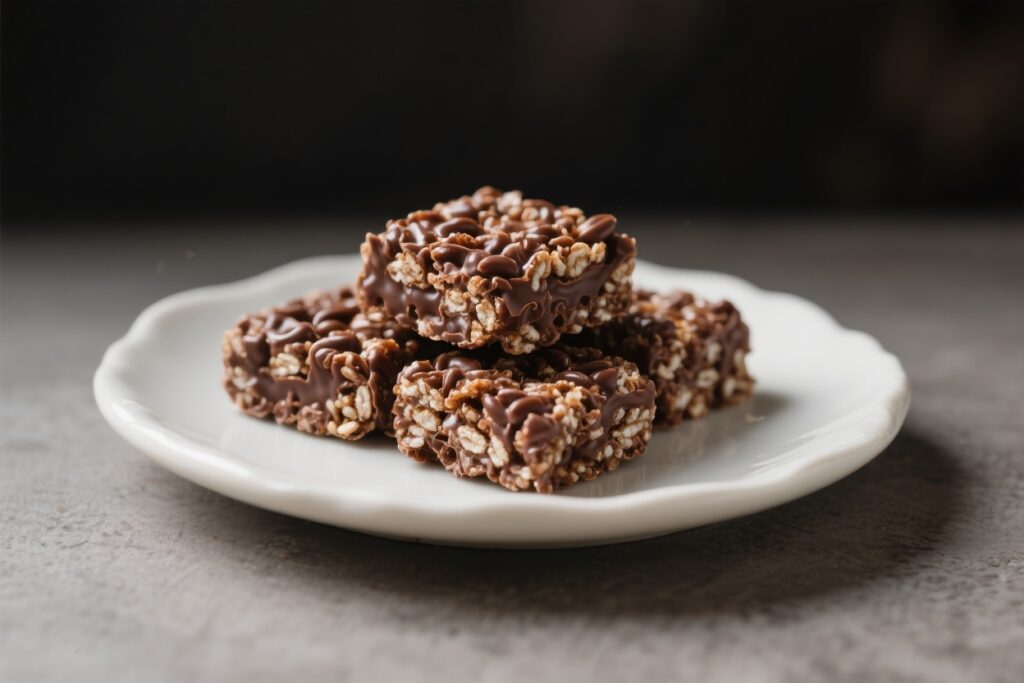
There’s something timeless about a tray of Chocolate Rice Krispie Squares on the counter. They’re simple, nostalgic, and always the first thing to disappear at a party. You only need a few pantry staples, and the whole process takes about 15 minutes.
The result is chewy, chocolatey, and just sweet enough. Whether you’re packing school lunches or making a last-minute dessert, this recipe never lets you down.
What Makes This Recipe So Good
- Fast and fuss-free: No oven, no complicated steps, and only one pot. It’s perfect for busy days.
- Rich chocolate flavor: Cocoa plus melted chocolate chips gives the bars a deep, satisfying taste.
- Great texture: Soft, gooey marshmallow holds everything together while the cereal stays lightly crisp.
- Adaptable: Swap in peanut butter, add sprinkles, or use dairy-free options.
It’s easy to customize.
- Kid- and adult-approved: Nostalgia meets real flavor. These aren’t just for bake sales.
Shopping List
- Unsalted butter – 6 tablespoons
- Mini marshmallows – 10 ounces (about 6 cups), plus 1 extra cup for stirring in at the end (optional for extra gooey texture)
- Semisweet chocolate chips – 1 cup
- Unsweetened cocoa powder – 2 tablespoons
- Vanilla extract – 1 teaspoon
- Kosher salt – a pinch (about 1/8 teaspoon)
- Rice Krispies or crispy rice cereal – 6 cups
- Optional add-ins/toppings: 1/2 cup peanut butter, flaky sea salt for topping, sprinkles, mini M&M’s, or crushed pretzels
- For the pan: Nonstick spray or extra butter for greasing, plus parchment paper
How to Make It
- Prep the pan: Line a 9×13-inch baking pan with parchment paper, leaving some overhang on the long sides for easy lifting. Lightly grease the parchment.
- Measure ingredients first: Set out your cereal in a large bowl, open the marshmallows, and have the chocolate chips ready.
This recipe moves fast once you start melting.
- Melt the butter: In a large pot over low heat, melt the butter gently. Avoid high heat to prevent scorching.
- Add marshmallows: Stir in 10 ounces of mini marshmallows. Keep heat on low and stir constantly until they’re almost fully melted and glossy.
- Mix in chocolate: Add the chocolate chips and cocoa powder.
Stir until the chocolate is fully melted and the mixture is smooth. Remove from heat.
- Flavor boost: Stir in vanilla extract and a pinch of salt. This keeps the sweetness in check and deepens the chocolate flavor.
- Optional extra-gooey step: Fold in the extra 1 cup of mini marshmallows now, off the heat, for little pockets of softness.
- Combine with cereal: Add the crispy rice cereal to the pot.
Use a rubber spatula to gently fold until everything is evenly coated. Work quickly so it doesn’t set in the pot.
- Press into pan: Transfer the mixture to the lined pan. Lightly grease your spatula or your hands, then press the mixture into an even layer.
Don’t pack it down too hard or the bars will be tough.
- Optional toppings: While warm, sprinkle with flaky sea salt, sprinkles, or mini candies. Press lightly so they stick.
- Let it set: Allow the pan to sit at room temperature for 45–60 minutes, or chill for 20–30 minutes if you’re in a hurry.
- Slice and serve: Use the parchment overhang to lift the slab out. Cut into squares with a sharp knife.
For cleaner cuts, wipe the knife between slices.
Keeping It Fresh
Store the squares in an airtight container at room temperature for up to 3 days. If you live in a warm climate, keep them in a cool spot or refrigerate to maintain structure. If chilled, let them sit out for 10–15 minutes before serving so they soften slightly.
To freeze, wrap individual squares tightly in plastic, then place them in a freezer bag.
Freeze for up to 1 month. Thaw at room temperature for about 30 minutes before eating.
Why This is Good for You
- Portion control made easy: These are naturally portioned, so you can enjoy a treat without going overboard.
- Simple ingredients: No unpronounceable additives when you make them at home. You know exactly what goes in.
- Customizable for dietary needs: You can choose dairy-free butter and marshmallows, or use dark chocolate for less sugar.
- Feel-good factor: Sharing homemade treats builds connection.
There’s value in that kind of comfort and joy.
Common Mistakes to Avoid
- Using high heat: This can scorch the butter and seize the chocolate. Keep it low and patient for a glossy, smooth mixture.
- Overpacking the mixture: Pressing too hard makes bars dense and hard. Aim for gentle, even pressure.
- Not measuring ahead: The mixture sets quickly.
Have cereal and add-ins ready before melting.
- Skipping salt: Even a small pinch balances sweetness and boosts chocolate flavor. Don’t leave it out.
- Cutting too soon: Warm bars can crumble. Let them set to get clean, neat squares.
Alternatives
- Peanut Butter Chocolate: Stir 1/2 cup creamy peanut butter into the melted marshmallow mixture with the chocolate.
Top with chopped peanuts.
- Salted Caramel: Swirl in 1/4 cup thick caramel sauce after mixing in the cereal. Finish with flaky sea salt.
- Dark Chocolate Almond: Use dark chocolate chips, add 1/2 teaspoon almond extract, and sprinkle sliced almonds on top.
- Mint Chocolate: Add 1/2 teaspoon peppermint extract and use chopped mint chocolate pieces as a topping.
- Dairy-Free/Vegan: Use vegan butter, vegan marshmallows, and dairy-free chocolate chips. Check that your cereal is certified vegan.
- Gluten-Free: Choose a certified gluten-free crispy rice cereal and ensure marshmallows and chocolate are GF as well.
FAQ
Can I use regular marshmallows instead of mini?
Yes.
Large marshmallows melt a little slower, so cut them in half and stir patiently over low heat. Measure by weight (10 ounces) for best results.
How do I keep the mixture from sticking to the spatula?
Lightly grease your spatula or hands with butter or neutral oil. You can also use a piece of parchment paper to press the mixture down without sticking.
Why did my bars turn out hard?
They were likely pressed too firmly or cooked over high heat.
Keep the heat low while melting, and press the mixture into the pan gently instead of packing it tight.
Can I reduce the sweetness?
Use dark chocolate chips, add a bit more salt, and skip the extra cup of marshmallows. You can also add 2 tablespoons of peanut butter to balance the sweetness with richness.
How long do they last?
They’re best within 2–3 days at room temperature. After that, they can dry out.
If you need to keep them longer, freeze them and thaw before serving.
Do I need the cocoa powder if I’m using chocolate chips?
No, but it deepens the flavor and makes the bars more chocolate-forward. If you skip it, the squares will still be great—just a bit milder.
Can I make these without marshmallows?
Marshmallows are classic, but you can try a no-bake syrup version using honey or brown rice syrup with peanut butter and chocolate. The texture will be different but still tasty.
What size pan should I use if I want thicker bars?
Use an 8×8 or 9×9-inch pan for taller, bakery-style squares.
They’ll be thicker and chewier, and you may need an extra 5–10 minutes to set.
In Conclusion
Chocolate Rice Krispie Squares are the kind of treat that checks every box—simple, fast, and undeniably delicious. With a few pantry staples and a single pot, you get a batch of chewy, chocolatey bars that make any day better. Keep the heat low, don’t press too hard, and add a little salt.
The rest takes care of itself. Once you make them this way, you’ll reach for this recipe again and again.