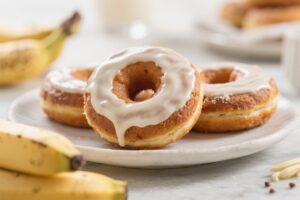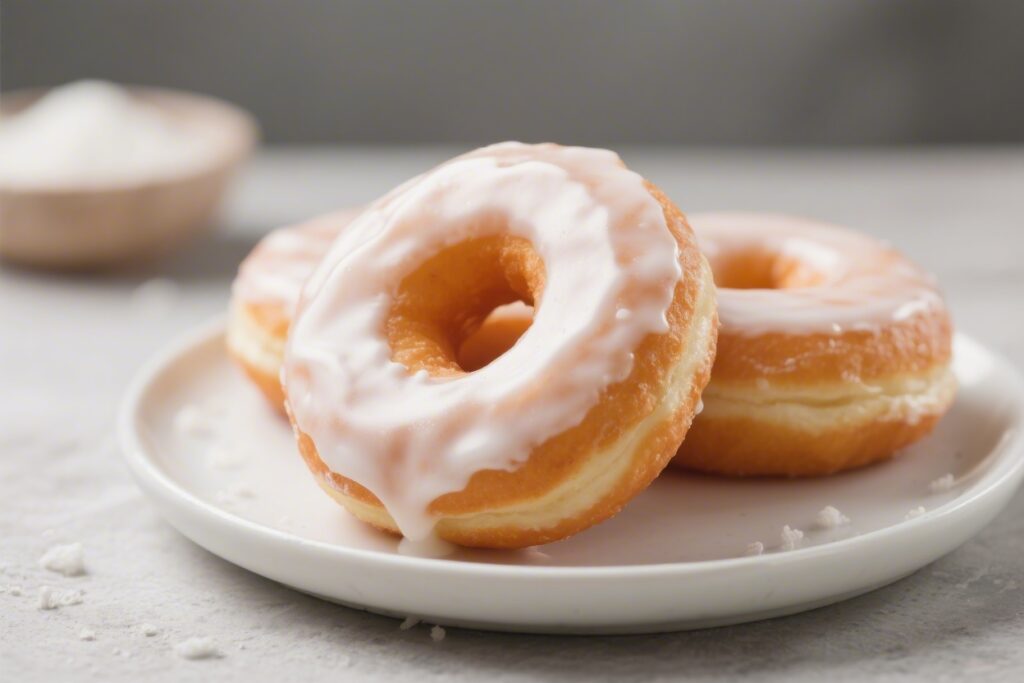
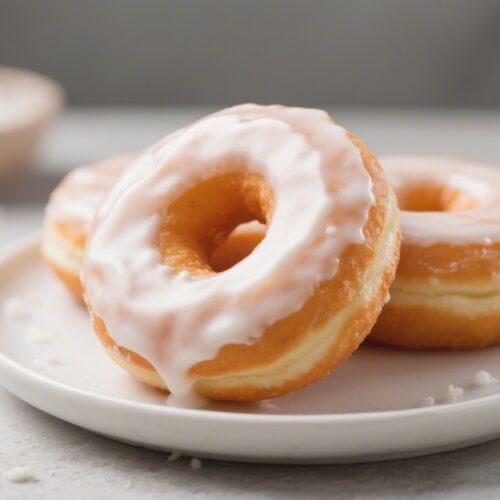
These are the doughnuts people dream about: soft, fluffy rings with a thin, shiny glaze that crackles just a bit when you bite in. They’re warm, sweet, and smell like a bakery on a Saturday morning. You don’t need fancy equipment, just patience and a good pot for frying.
The dough is simple and forgiving, and the glaze is just a quick whisk away. Make a batch for brunch or a lazy afternoon treat, and watch them disappear.
What Makes This Recipe So Good
- Light, pillowy texture: The dough uses egg and milk for a tender crumb that stays soft even after cooling.
- Easy-to-handle dough: It’s enriched but not overly sticky, so rolling and cutting are approachable for beginners.
- Balanced sweetness: The glaze adds shine and sweetness without turning the doughnuts cloying.
- Foolproof frying temperatures: Clear cues and ranges help you get that golden-brown finish without greasy centers.
- Make-ahead friendly: You can slow-proof in the fridge and fry when you’re ready.
Recipe Card
Classic Glazed Ring Doughnuts
Ingredients
- All-purpose flour (plus extra for dusting)
- Granulated sugar
- Whole milk (or 2%, warmed)
- Active dry yeast (or instant yeast)
- Unsalted butter (softened)
- Large eggs
- Salt
- Vanilla extract
- Vegetable oil or canola oil (for frying)
- Powdered sugar
- Light corn syrup (optional, for a shinier glaze)
Instructions
- Warm the milk and wake the yeast: Heat milk until just warm to the touch, about 105–110°F (40–43°C). Stir in a pinch of sugar and the yeast. Let it sit 5–10 minutes until foamy. If it doesn’t foam, start again with fresh yeast.
- Mix the dough: In a large bowl, whisk flour, sugar, and salt. Add the foamy yeast mixture, eggs, vanilla, and softened butter. Mix with a dough hook or wooden spoon until a shaggy dough forms.
- Knead to smooth: Knead 6–8 minutes (stand mixer on medium-low, or by hand on a lightly floured surface) until the dough is soft, elastic, and slightly tacky but not sticky. Add a sprinkle of flour only if it clings heavily to your hands.
- First rise: Place the dough in a lightly greased bowl, cover, and let rise in a warm spot until doubled, about 1–1½ hours. A slow overnight rise in the fridge also works and adds flavor.
- Roll and cut: Turn the dough onto a floured surface. Roll to about ½ inch (1.25 cm) thick. Cut out large rounds with a 3-inch cutter, then punch out centers with a 1-inch cutter. Gently gather scraps, rest 5 minutes, and re-roll once.
- Second rise: Place rings on parchment-lined sheets lightly dusted with flour. Cover loosely and let rise until puffy, 30–45 minutes. They should look airy and feel delicate if you lift a corner of parchment.
- Heat the oil: In a heavy pot, heat 2–3 inches of oil to 350–360°F (175–182°C). Keep a thermometer clipped on and adjust the heat often. Too cool and they’ll get greasy; too hot and they’ll brown before cooking through.
- Fry the doughnuts: Working in batches, slide doughnuts into the oil by lifting on parchment squares, then peeling the paper away with tongs. Fry 45–60 seconds per side until golden. Drain on a rack set over a sheet pan. Fry the holes too—they cook faster.
- Make the glaze: Whisk powdered sugar, a splash of warm milk, vanilla, a pinch of salt, and a teaspoon of corn syrup (optional) until smooth and pourable. Aim for a thin ribbon that disappears back into the bowl in 2–3 seconds.
- Dip while warm: When doughnuts are warm but not hot, dunk each one fully in glaze, flip to coat, then let excess drip back. Set on the rack to set for 10–15 minutes until glossy.
- Serve fresh: Enjoy within a few hours for peak texture, or see storage tips below.
Storage Instructions
- Same day: Keep uncovered for the first hour so the glaze sets, then loosely cover at room temperature for up to 24 hours.
- Short-term: Store in an airtight container at room temperature for 1–2 days.
Add a small piece of bread or a sugar cube inside to help retain moisture.
- Freezing unglazed: Freeze unglazed doughnuts in a single layer, then bag for up to 2 months. Thaw at room temp and glaze fresh.
- Reheating: Warm 5–7 minutes in a 300°F (150°C) oven. Microwaving softens the glaze and can make them rubbery—use sparingly.
Health Benefits
Doughnuts are an occasional treat, but you can still make thoughtful choices.
Using fresh oil and keeping it at the right temperature reduces oil absorption, meaning less greasiness and fewer excess calories. A homemade glaze lets you control sweetness and avoid additives found in some store-bought versions. Milk and eggs add a bit of protein and B vitamins.
If you want a lighter take, consider smaller portions or make mini rings for built-in moderation.
What Not to Do
- Don’t rush the rises: Underproofed dough fries dense. Wait for that puffy, airy look before heating the oil.
- Don’t guess the oil temp: Use a thermometer. Inconsistent heat leads to raw centers or greasy exteriors.
- Don’t overwork the dough: Too much flour or kneading can toughen the crumb.
- Don’t crowd the pot: Fry in small batches to keep the oil hot and the browning even.
- Don’t glaze too hot: Glaze slides off or turns patchy on very hot doughnuts.
Alternatives
- Baked version: Baked “doughnuts” use a denser batter in a doughnut pan.
They’re different in texture but still tasty with the same glaze.
- Citrus glaze: Swap milk with fresh lemon or orange juice and add zest for a bright, tangy finish.
- Maple or honey glaze: Replace part of the liquid with pure maple syrup or honey for a deeper flavor.
- Spice it up: Add cinnamon, nutmeg, or cardamom to the dough for a warm, nostalgic note.
- Dairy-free: Use almond or oat milk and a plant-based butter. Frying oil stays the same.
- Yeast swap: If using instant yeast, mix it directly with dry ingredients and proceed without proofing in warm milk—still aim for the same dough texture.
FAQ
Why are my doughnuts greasy?
Usually the oil was too cool, or the dough sat too long before frying and lost some structure. Keep the oil at 350–360°F and fry soon after the second rise.
Drain on a rack, not paper towels, to avoid steam traps.
How do I know the dough is kneaded enough?
The dough should feel smooth and stretchy. If you tug a small piece, it should stretch thin without tearing right away (a soft “windowpane”). Slight tackiness is fine; sticky is not.
Can I proof the dough overnight?
Yes.
Let the first rise happen slowly in the fridge for 8–12 hours. Bring to room temp, then roll, cut, and do the second rise as usual. The flavor improves and the dough is easier to handle.
What oil is best for frying?
Use a neutral, high-smoke-point oil like vegetable, canola, or peanut oil.
Avoid olive oil or anything strongly flavored. Fresh oil gives the cleanest taste.
Why did my glaze turn cloudy or too thick?
It likely needs a touch more warm liquid or a few seconds of vigorous whisking. A teaspoon of corn syrup helps keep it shiny.
If it’s too thin, whisk in a bit more powdered sugar.
Can I make filled doughnuts with this dough?
Yes—skip cutting the center hole and fry as rounds. Toss in sugar or glaze, then fill with jam or custard once cool using a piping bag with a long tip.
How do I keep the shape while transferring to oil?
Proof on small squares of parchment and lower each square into the oil. Peel the paper away with tongs once the doughnut floats.
This prevents stretching or deflation.
Wrapping Up
Classic glazed ring doughnuts are all about simple dough, steady oil, and a quick, glossy glaze. With a little planning, you’ll get bakery-quality results at home—warm, soft, and irresistibly shiny. Keep the thermometer handy, give the dough time to rise, and enjoy the kind of treat that makes any morning feel special.
Once you’ve got the basics down, change up the glaze and make them your own.