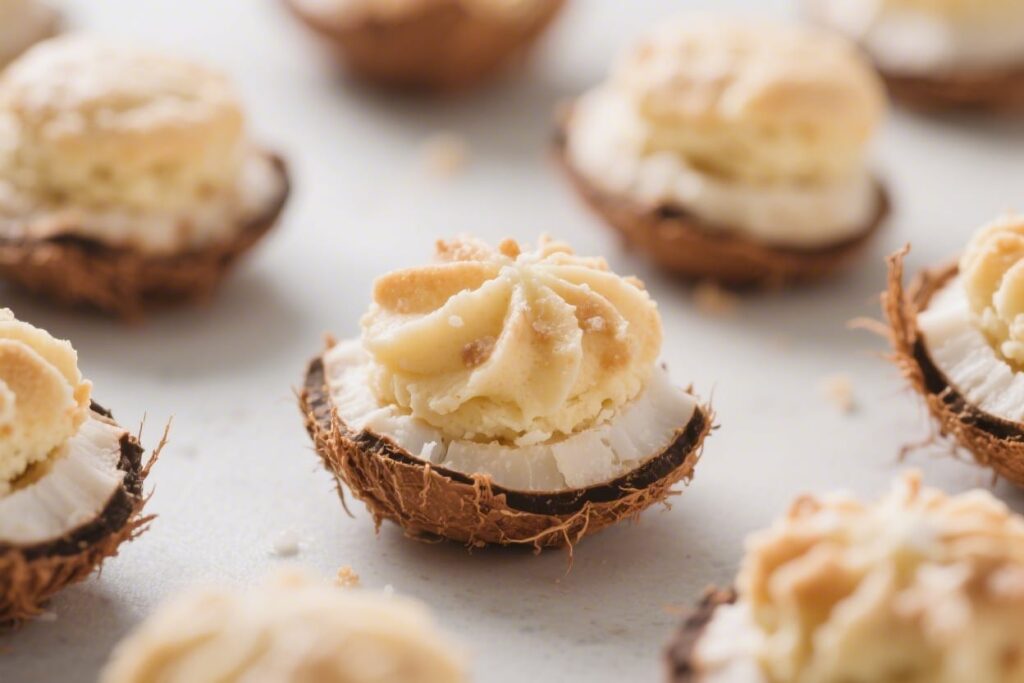
Coconut nest macaroons are a playful twist on a classic treat. You get the chewy, toasty coconut you love, shaped into cute little nests and filled with chocolate and candy eggs. They’re easy to make, look festive, and taste rich and satisfying.
Kids can help shape the nests, and adults will appreciate how quickly everything comes together. Whether you’re baking for a spring gathering or just want a sweet bite with your coffee, these macaroons deliver.
Coconut Nest Macaroons
Ingredients
- 4 cups 340 g sweetened shredded coconut
- 2/3 cup 135 g granulated sugar
- 2 large egg whites
- 2 tablespoons all-purpose flour
- 1 teaspoon pure vanilla extract
- 1/4 teaspoon almond extract optional but lovely
- 1/4 teaspoon fine sea salt
- 6 ounces 170 g chocolate chips or chopped chocolate (milk, dark, or white)
- Mini candy eggs or jelly beans for topping
Instructions
- Preheat and prepare: Heat the oven to 325°F (165°C). Line two baking sheets with parchment paper or silicone baking mats.
- Mix the dry ingredients: In a large bowl, combine the shredded coconut, sugar, flour, and salt. Stir until the coconut is evenly coated and no clumps of flour remain.
- Whisk the wet ingredients: In a small bowl, whisk the egg whites, vanilla, and almond extract (if using) until frothy, about 20–30 seconds. No need for stiff peaks—just combine well.
- Combine to form the dough: Pour the egg white mixture over the coconut mixture. Stir with a spatula until the coconut is fully moistened and the mixture holds together when pressed.
- Scoop the mounds: Use a heaping tablespoon or a medium cookie scoop to portion the mixture onto the baking sheets, spacing them about 2 inches apart. You should get about 18–22 mounds.
- Shape the nests: With slightly damp fingertips, press a small well into the center of each mound to form a nest shape. Neaten the sides so they don’t spread too much.
- Bake: Bake for 18–22 minutes, rotating the pans halfway through. The edges should be golden brown and the tops lightly toasted. Remove from the oven and let the nests cool on the sheets for 5 minutes, then transfer to a wire rack to cool completely.
- Melt the chocolate: Place the chocolate in a microwave-safe bowl and heat in 20–30 second bursts, stirring between each round, until smooth. Alternatively, melt over a double boiler on the stove.
- Fill the nests: Spoon about 1–2 teaspoons of melted chocolate into the center of each cooled nest. Immediately press 2–3 mini candy eggs or a few jelly beans on top. Let the chocolate set at room temperature, or chill for 10 minutes to speed it up.
- Serve: Once the chocolate is firm, the macaroons are ready to enjoy. Expect crisp edges, chewy centers, and a creamy chocolate bite.
Why This Recipe Works
Simple ingredients, big flavor: Sweetened coconut, egg whites, and a touch of vanilla create a naturally rich, chewy cookie. No special tools or techniques required.
Reliable structure: A bit of flour and egg whites hold the nests together so they bake evenly and keep their shape.
You get crisp edges with a moist center.
Flexible filling: Melted chocolate acts like glue and adds a silky layer inside each nest. You can use milk, dark, or white chocolate to match your taste.
Make-ahead friendly: The cookies stay fresh for days, so you can bake ahead and fill right before serving.
Ingredients
- 4 cups (340 g) sweetened shredded coconut
- 2/3 cup (135 g) granulated sugar
- 2 large egg whites
- 2 tablespoons all-purpose flour
- 1 teaspoon pure vanilla extract
- 1/4 teaspoon almond extract (optional but lovely)
- 1/4 teaspoon fine sea salt
- 6 ounces (170 g) chocolate chips or chopped chocolate (milk, dark, or white)
- Mini candy eggs or jelly beans for topping
Step-by-Step Instructions
- Preheat and prepare: Heat the oven to 325°F (165°C). Line two baking sheets with parchment paper or silicone baking mats.
- Mix the dry ingredients: In a large bowl, combine the shredded coconut, sugar, flour, and salt. Stir until the coconut is evenly coated and no clumps of flour remain.
- Whisk the wet ingredients: In a small bowl, whisk the egg whites, vanilla, and almond extract (if using) until frothy, about 20–30 seconds. No need for stiff peaks—just combine well.
- Combine to form the dough: Pour the egg white mixture over the coconut mixture. Stir with a spatula until the coconut is fully moistened and the mixture holds together when pressed.
- Scoop the mounds: Use a heaping tablespoon or a medium cookie scoop to portion the mixture onto the baking sheets, spacing them about 2 inches apart. You should get about 18–22 mounds.
- Shape the nests: With slightly damp fingertips, press a small well into the center of each mound to form a nest shape. Neaten the sides so they don’t spread too much.
- Bake: Bake for 18–22 minutes, rotating the pans halfway through. The edges should be golden brown and the tops lightly toasted. Remove from the oven and let the nests cool on the sheets for 5 minutes, then transfer to a wire rack to cool completely.
- Melt the chocolate: Place the chocolate in a microwave-safe bowl and heat in 20–30 second bursts, stirring between each round, until smooth. Alternatively, melt over a double boiler on the stove.
- Fill the nests: Spoon about 1–2 teaspoons of melted chocolate into the center of each cooled nest. Immediately press 2–3 mini candy eggs or a few jelly beans on top. Let the chocolate set at room temperature, or chill for 10 minutes to speed it up.
- Serve: Once the chocolate is firm, the macaroons are ready to enjoy. Expect crisp edges, chewy centers, and a creamy chocolate bite.
Storage Instructions
- Room temperature: Store in an airtight container for up to 4 days. Keep layers separated with parchment to prevent sticking.
- Refrigerator: Good for up to 1 week, especially in warm climates. Bring to room temp before serving for best texture.
- Freezer: Freeze unfilled nests for up to 2 months. Thaw at room temperature, then add melted chocolate and candy before serving.
- Make ahead: Bake the nests a day or two early and fill on the day you plan to serve.
Benefits of This Recipe
- Quick and approachable: No fancy equipment, no long chill times, no complicated steps.
- Kid-friendly project: Scooping and shaping the nests is a fun task for little hands.
- Festive look with minimal effort: The finished cookies look impressive on a dessert tray.
- Gluten-light option: Only a small amount of flour is used. You can also swap in a 1:1 gluten-free blend if needed.
- Customizable: Choose your chocolate, toppings, and flavors to match any occasion.
Common Mistakes to Avoid
- Skipping the flour: Even 2 tablespoons help the nests hold their shape. Without it, they may spread or crumble.
- Overbaking: Golden edges are good; deep brown means dry. Check at 16 minutes and watch closely.
- Shaping while hot: Press the wells before baking. Doing it after baking can crack the cookies.
- Adding chocolate too early: If the nests are warm, the chocolate can run and won’t set neatly. Cool completely first.
- Using wet coconut: If your coconut is unusually moist, the batter can get soggy. Add 1–2 extra teaspoons of flour to balance.
Variations You Can Try
- Dark chocolate and sea salt: Fill with dark chocolate and finish with a light sprinkle of flaky salt.
- White chocolate raspberry: Use white chocolate and add a tiny spoonful of raspberry jam under the candy eggs.
- Almond joy style: Stir 1/4 cup mini chocolate chips and 1/4 cup chopped toasted almonds into the coconut mixture. Fill with milk chocolate.
- Lemon coconut: Add 1 teaspoon lemon zest to the batter and fill with white chocolate. Top with pastel sprinkles instead of eggs.
- Nut-free crunch: Swap candy eggs for crisped rice cereal clusters set in chocolate for a crunchy center.
- Gluten-free: Replace the flour with a 1:1 gluten-free baking blend or 2 teaspoons cornstarch.
FAQ
Can I use unsweetened shredded coconut?
Yes, but you’ll need to increase the sugar slightly for balance. Start by adding 2–3 extra tablespoons of sugar. The texture may be a bit drier, so mix well and press the mounds firmly.
Do I need to whip the egg whites?
No.
A quick whisk until frothy is enough. You’re using them mainly as a binder, not for lift, so there’s no need for peaks.
Can I skip the chocolate filling?
Absolutely. The macaroons are tasty on their own.
If you skip chocolate, consider adding a drizzle of caramel or a dusting of powdered sugar for a simple finish.
How do I prevent sticking?
Use parchment or silicone mats. Avoid greasing the pan with butter or spray, which can lead to uneven browning and spreading.
What if my nests fall apart?
If the mixture is too loose, add 1–2 teaspoons more flour and press the mounds together more firmly. Make sure you’re using egg whites from large eggs and measure the coconut accurately.
Can I make them bite-sized?
Yes.
Use a small cookie scoop and reduce the bake time to 12–15 minutes. Keep the wells shallow so there’s room for chocolate without overflow.
What chocolate works best?
Milk chocolate gives a classic candy-bar vibe. Dark chocolate adds a grown-up richness.
White chocolate is sweet and pairs well with fruit or citrus zest. Use what you love or mix and match.
Wrapping Up
These coconut nest macaroons are the kind of dessert that looks special but takes very little effort. With a chewy coconut base and a smooth chocolate center, they check both the taste and presentation boxes.
Keep a batch on hand for holidays, bake sales, or an easy afternoon baking project. Once you’ve made the base recipe, play with flavors and toppings to make it your own. Simple, fun, and reliably delicious—what more could you want in a cookie?