If your cake has ever come out dense, heavy, or just a little disappointing, there is a very good chance the issue started right at the beginning. Before the flour. Before the eggs. Before the oven was even turned on.
The creaming method is one of the most important techniques in baking, and it is often the step beginners rush through. Learning how to cream butter and sugar properly is what creates the light, fluffy texture in cakes and cupcakes. When done correctly, this simple step traps tiny pockets of air that help your bake rise beautifully in the oven.
The good news is that this is not complicated or intimidating. Once you know what to look for, it becomes second nature. In this guide, I will show you exactly what the creaming method in baking means, how long to beat your butter and sugar, and how to avoid the common mistakes that lead to dense cakes.
Because once you master this one technique, your bakes instantly feel lighter, softer, and far more reliable. And that is when baking starts to feel really joyful.
What Does the Creaming Method in Baking Actually Mean?
When a recipe tells you to cream butter and sugar, it is not just asking you to mix them together. The creaming method in baking is a specific technique that creates the light, soft texture we all want in cakes and cupcakes.
Here is what is really happening.
As you beat butter and sugar together, the sugar crystals cut into the butter. This creates tiny air pockets throughout the mixture. Those little pockets of air are incredibly important. When your cake goes into the oven, the heat causes that trapped air to expand. That expansion helps your cake rise and gives it a lighter crumb instead of a dense, heavy texture.
So if you have ever wondered, “Why is my cake dense?”, the answer is often that the butter and sugar were not creamed properly at the start.
Creaming is not about dissolving the sugar completely. It is about incorporating air. That is why simply stirring with a spoon for a few seconds will not give you the same result as properly beating the mixture until it becomes pale and fluffy.
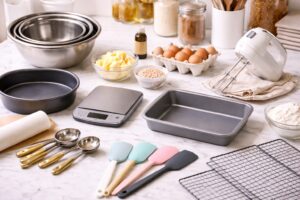
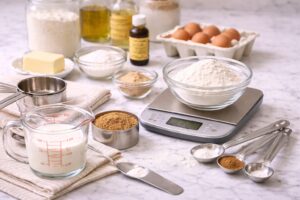
What You Need to Cream Butter and Sugar Properly
You do not need anything fancy, but the right tools make it much easier and more consistent.
A Stand Mixer
A stand mixer makes the process effortless and gives you excellent volume. If you bake regularly, something like this stand mixer can be a worthwhile investment.
A Hand Mixer
Perfect for beginners and occasional bakers. A simple electric hand mixer will cream butter and sugar beautifully without taking up much space.
A Mixing Bowl and Spatula
You will also need a sturdy mixing bowl and a silicone spatula to scrape down the sides. This silicone spatula set is ideal for making sure everything is evenly incorporated.
You can cream butter and sugar by hand with a wooden spoon, but it takes longer and requires more effort to properly trap enough air. For light, fluffy cakes, an electric mixer really does make a noticeable difference.
Once you understand that creaming is about building structure and incorporating air, the technique feels far less mysterious. It is simply the foundation for a better bake.
Why Creaming Butter and Sugar Matters So Much
It might seem like a small step, but creaming butter and sugar properly can completely change the texture of your finished cake.
When you beat the butter and sugar together correctly, you are building structure right from the start. Those tiny air pockets you create become the framework that supports the batter as it bakes. In the oven, the trapped air expands, helping your cake rise evenly and develop a soft, tender crumb.
If this step is rushed or underdone, the batter will not have enough air built into it. The result is often a cake that feels heavy, tight, or slightly greasy. That is usually the real answer to the question, “Why is my cake dense?”
Proper creaming also helps with:
- A lighter, fluffier texture
- Better rise in the oven
- A more even crumb
- Improved moisture balance
- A cake that feels soft rather than compact
And here is the reassuring part. You do not need advanced skills to get this right. You simply need to beat the mixture long enough and pay attention to how it looks and feels.
Think of the creaming method as laying the foundation for your bake. When the base is strong and airy, everything that follows becomes easier and more reliable. That is how simple desserts turn into sweet moments that actually work every time.
Step by Step: How to Cream Butter and Sugar Properly
Now that you know why this step matters, let’s walk through exactly how to cream butter and sugar properly so your cakes turn out light and fluffy every time.
This is simple, but the details make all the difference.
Step 1: Start with Properly Softened Butter
Your butter should be at room temperature. That means soft enough that you can press it gently with your finger and leave a slight indent, but not so soft that it looks shiny or greasy.
Cold butter will not trap air properly. Melted butter cannot hold structure at all.
If your kitchen is cool, cut the butter into small cubes and let it sit for 20 to 30 minutes. It should feel soft but still hold its shape.
Step 2: Combine Butter and Sugar First
Add your softened butter and sugar to a large mixing bowl.
Using a stand mixer or hand mixer on medium speed, begin beating the mixture. At first, it will look thick and slightly grainy. That is completely normal.
After about a minute, you will notice the texture starting to change. The mixture will loosen and become smoother.
Step 3: Beat Until Pale and Fluffy
This is the step most beginners stop too early.
To properly use the creaming method in baking, you need to beat the butter and sugar for long enough to incorporate air. This usually takes:
- 2 to 3 minutes with a stand mixer
- 3 to 5 minutes with a hand mixer
You are looking for three clear signs:
- The colour becomes noticeably lighter
- The texture looks soft and airy
- The mixture increases slightly in volume
It should look almost whipped, not dense or pasty.
Step 4: Scrape Down the Bowl
Halfway through mixing, stop and scrape down the sides of the bowl with a spatula. This ensures all the butter is evenly incorporated.
Skipping this step can leave dense pockets in your batter, which affects the final texture of your cake.
When you follow these steps, you are not just mixing ingredients. You are building the structure that helps your cake rise beautifully and bake evenly.
It is a small moment in the recipe, but it is one of the most powerful techniques you can master as a beginner baker. And once you see that pale, fluffy mixture in your bowl, you will know you have done it right.
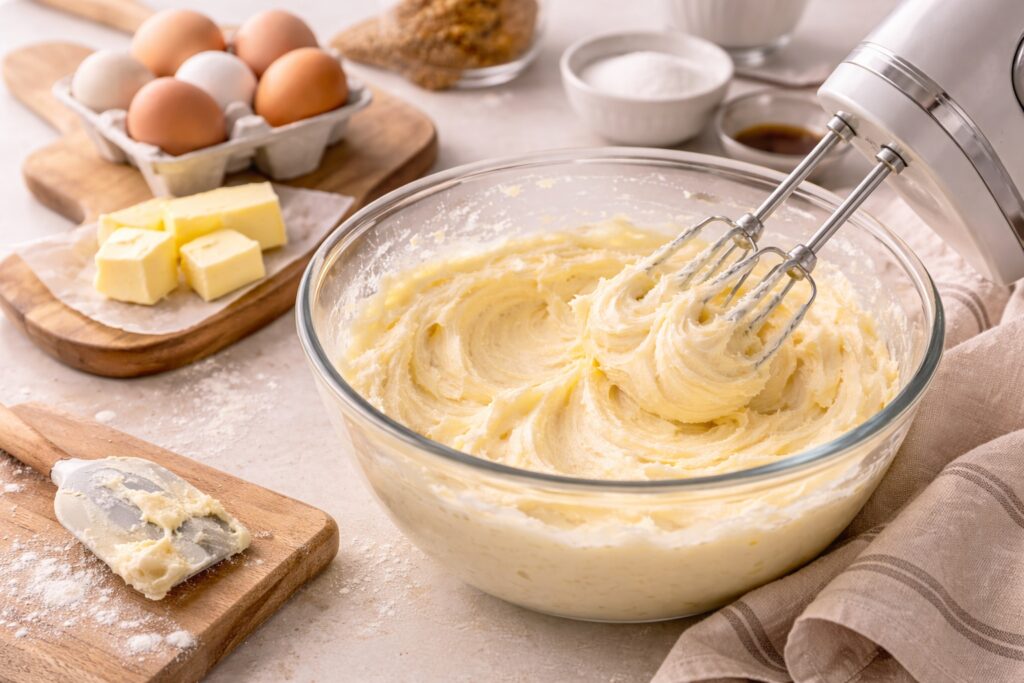
What Properly Creamed Butter and Sugar Should Look Like
One of the easiest ways to know if you have mastered how to cream butter and sugar properly is by looking at it.
The visual cues tell you everything.
When butter and sugar are fully creamed, the mixture should look noticeably lighter in colour. It will shift from a deeper yellow to a pale, creamy shade. This change happens because you have incorporated air into the butter.
The texture should look soft and fluffy, almost like a thick frosting. If you lift your beaters or spoon, the mixture should hold gentle ridges and soft peaks rather than sitting flat and heavy in the bowl.
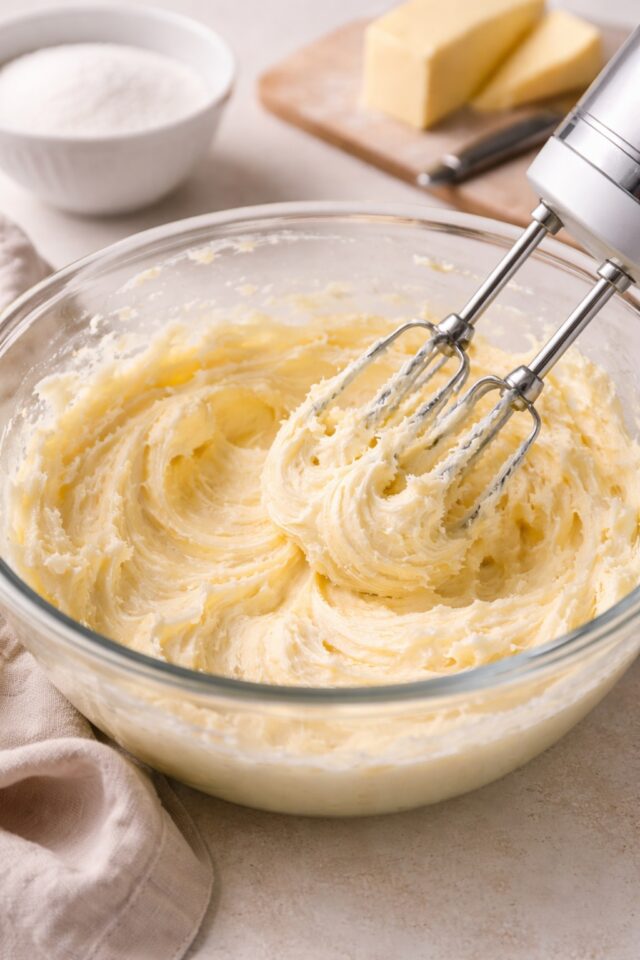
Here is what you want to see:
- A pale, creamy colour
- A light and airy texture
- Slightly increased volume
- No large streaks of unmixed butter
- Fine sugar texture rather than gritty clumps
If the mixture still looks dark yellow, dense, or compact, it simply needs more mixing time.
If it looks greasy or overly loose, the butter may have been too warm.
Do not worry if the sugar has not completely dissolved. In the creaming method in baking, the goal is not to dissolve the sugar. The goal is to trap air. The sugar crystals are actually helping you create those tiny air pockets that give your cake structure.
Once you see that pale, fluffy mixture in your bowl, you can feel confident moving on to the next step in your recipe. That light texture is the foundation for a soft, tender cake that rises beautifully instead of turning dense.
And when you start recognising these visual signs, baking becomes far less guesswork and far more joyful.
Common Mistakes When Creaming Butter and Sugar
Even though the creaming method is simple, a few small mistakes can completely change the outcome of your bake. The good news is that they are all easy to fix once you know what to look for.
Using Butter That Is Too Cold
Cold butter is one of the biggest reasons the creaming method does not work properly.
If the butter is too firm, the sugar cannot cut into it effectively. That means fewer air pockets, which leads to less rise in the oven. Instead of a light, fluffy cake, you may end up with a dense texture.
Always start with butter that is soft but still slightly cool to the touch.
Using Butter That Is Too Warm or Melted
On the other end of the scale, melted butter cannot trap air at all.
If your butter looks shiny, greasy, or partially liquid, it is too warm. This often happens if butter is microwaved too quickly. Once the structure is lost, you cannot build proper air pockets, and your cake may turn out flat or heavy.
Room temperature really does matter here.
Not Beating Long Enough
This is the most common beginner mistake.
If you stop mixing too soon, the butter and sugar will still look slightly yellow and dense. It might feel smooth, but it will not have enough air incorporated.
When in doubt, mix a little longer. You are looking for pale, fluffy, and slightly increased in volume. That is your signal that the creaming method in baking has worked properly.
Over-Beating
Yes, it is possible to go too far.
If you beat the mixture excessively, especially in a very warm kitchen, the butter can become overly soft and start to lose its structure. This can cause the batter to split once eggs are added.
Mix until pale and fluffy, then stop. You are building structure, not whipping cream.
If your cake has ever sunk, turned out dense, or felt slightly greasy, one of these small creaming mistakes is often the reason.
The reassuring part is this: once you understand how to cream butter and sugar properly, these problems almost disappear. And baking starts to feel calm, consistent, and completely achievable.
Can You Cream Butter and Sugar by Hand?
Yes, you absolutely can cream butter and sugar by hand.
You do not need a stand mixer to make a beautiful, light cake. But it does take a little more time and effort.
If you are mixing by hand, use a sturdy wooden spoon and a large mixing bowl. Start by pressing the butter against the sides of the bowl to soften it slightly, then begin beating it together with the sugar using firm, circular motions.
At first, the mixture will feel thick and heavy. Keep going.
You will need to mix for several minutes, longer than you would with an electric mixer. As you continue, you should notice the colour starting to lighten and the texture becoming smoother and softer.
Here is what to focus on when creaming by hand:
- Use properly softened butter
- Mix with consistent pressure
- Scrape down the bowl regularly
- Continue until the mixture looks pale and slightly fluffy
It will not become quite as airy as when using a mixer, but you can still achieve a lovely result for smaller cakes and simple bakes.
If you bake regularly, an electric hand mixer does make the process quicker and more consistent. Something simple like this electric hand mixer can make a noticeable difference in texture without being complicated or expensive.
The most important thing is not the tool. It is understanding what you are trying to achieve.
Once you know that creaming butter and sugar properly is about building air and structure, you can make it work with whatever you have in your kitchen. And that is what makes baking feel achievable instead of overwhelming.
Frequently Asked Questions About Creaming Butter and Sugar
When you are learning how to cream butter and sugar properly, a few small questions tend to pop up again and again. Let’s clear them up so you can bake with confidence.
How Long Should I Cream Butter and Sugar?
In most cases:
- 2 to 3 minutes with a stand mixer
- 3 to 5 minutes with a hand mixer
- Several minutes longer if mixing by hand
The real answer is not just about time. It is about appearance. The mixture should look pale, soft, and slightly fluffy. If it still looks yellow and dense, keep mixing.
Should the Sugar Completely Dissolve?
No.
In the creaming method in baking, the sugar does not need to dissolve. In fact, the tiny sugar crystals are what help create those little air pockets in the butter. That is what gives your cake structure and lift.
A slightly textured feel is perfectly normal at this stage.
Can You Over-Cream Butter and Sugar?
Yes, although it is less common than under-creaming.
If you mix for too long, especially in a warm kitchen, the butter can become overly soft. This may cause the batter to split when eggs are added later. Mix until pale and fluffy, then stop.
Can You Use Brown Sugar Instead?
Yes, you can cream butter with brown sugar.
Brown sugar contains molasses, which adds moisture and a deeper flavour. The mixture may look slightly darker and feel a bit softer compared to white sugar, but the same visual signs apply. You still want it lighter in texture and slightly increased in volume.
Why Did My Cake Still Turn Out Dense?
If you properly creamed your butter and sugar and your cake is still dense, the issue may be elsewhere in the recipe.
Common causes include:
- Incorrectly measured flour
- Over-mixing after adding flour
- Expired raising agents
- Opening the oven door too early
Creaming is a major foundation step, but baking is a series of small techniques working together.
The reassuring part is this. Once you understand the creaming method, you have already mastered one of the most important skills in beginner baking. And that puts you well on your way to lighter, softer, more reliable cakes every time.
Bring It All Together
Now you know exactly how to cream butter and sugar properly, what it should look like, and what mistakes to avoid.
This one simple technique lays the foundation for soft, tender cakes that rise beautifully instead of turning dense. It is not about rushing through the first step. It is about building structure from the very beginning.
When your butter and sugar are pale, fluffy, and slightly increased in volume, you have already done a huge part of the work. Everything that follows in your recipe becomes easier and more reliable because that structure is already there.
If you want to see this technique in action, try it in a simple vanilla cake. It is the perfect way to practise the creaming method in baking and really see how much difference it makes to the final texture.
Once you master this step, baking starts to feel less like guesswork and more like confidence. And that is when those simple desserts truly turn into sweet moments that you can recreate again and again.
Try This Technique in a Simple Vanilla Cake
The best way to build confidence with the creaming method is to use it in a straightforward, reliable recipe.
A classic vanilla cake is perfect for practising how to cream butter and sugar properly because the texture tells you everything. When the creaming step is done well, the finished cake will be:
- Light and soft
- Evenly risen
- Tender with a fine crumb
- Moist without feeling heavy
If the creaming step is rushed, the difference is noticeable. The cake may feel tighter or slightly dense.
That is why I always recommend starting with a simple, beginner-friendly vanilla cake, such as the one here. It allows you to focus on technique without being distracted by complicated flavours or layers.
As you make it, pay attention to the butter and sugar stage. Watch the colour change. Notice the texture becoming fluffier. This is the moment that sets your cake up for success.
Once you see how much difference proper creaming makes, you will never rush this step again. And from here, every cake, cupcake, and traybake you make will benefit from that same strong foundation.
New to Baking?
If you are just starting out, do not worry. Every confident baker began with the basics.
Learning how to cream butter and sugar properly is one of the first real building blocks of baking. Once you understand this technique, so many recipes suddenly feel easier and more predictable.
If you are brand new, I recommend starting with my Baking Basics for Beginners guide, where I walk you through essential equipment, measuring correctly, folding techniques, and the most common beginner mistakes.
Take it step by step. Master one skill at a time.
That is how simple desserts turn into sweet moments you can recreate with confidence.