If you have ever followed a recipe exactly and still felt disappointed with the result, there is a very good chance the issue was not the recipe.
It was the measuring.
Baking is wonderfully simple, but it is also precise. A little too much flour can make a cake dry. Too little sugar can affect texture. An extra teaspoon of baking powder can change the structure completely. Small differences matter more than most beginners realise.
The good news is this.
Measuring ingredients properly is not complicated. Once you understand a few key principles, your cakes will rise better, your cookies will bake more evenly, and your traybakes will have the texture they are meant to have.
In this guide, I will walk you through:
• The difference between measuring by weight and volume
• How to measure flour the right way
• How to measure sugar and liquids correctly
• The most common beginner mistakes
• The simple tools that make everything easier
This is one of those foundational skills that changes everything.
When you measure accurately, baking feels predictable instead of frustrating. Recipes work the way they are meant to. And your confidence grows with every batch.
Let’s start by understanding why measuring matters so much in baking.
Why Measuring Matters in Baking
Baking is not just mixing ingredients together and hoping for the best.
It is structure. It is balance. It is chemistry.
Unlike cooking, where you can adjust seasoning as you go, baking relies on precise ratios. Flour, sugar, fat, eggs, and raising agents all work together in very specific ways. Change one measurement, even slightly, and the final result can shift completely.
That is why measuring properly is one of the most important skills a beginner can learn.
Small Differences Make a Big Impact
Here is what can happen when ingredients are not measured accurately:
Too much flour
• Dense cakes
• Dry crumb
• Heavy cookies
Too little flour
• Flat cookies
• Collapsing cakes
• Sticky texture
Too much baking powder
• Bitter taste
• Large uneven holes
• Cakes that rise fast and then sink
Too little sugar
• Dry texture
• Pale colour
• Less flavour
These are not dramatic mistakes. Often they are caused by just a few extra spoonfuls or a slightly packed cup.
That is how sensitive baking can be.
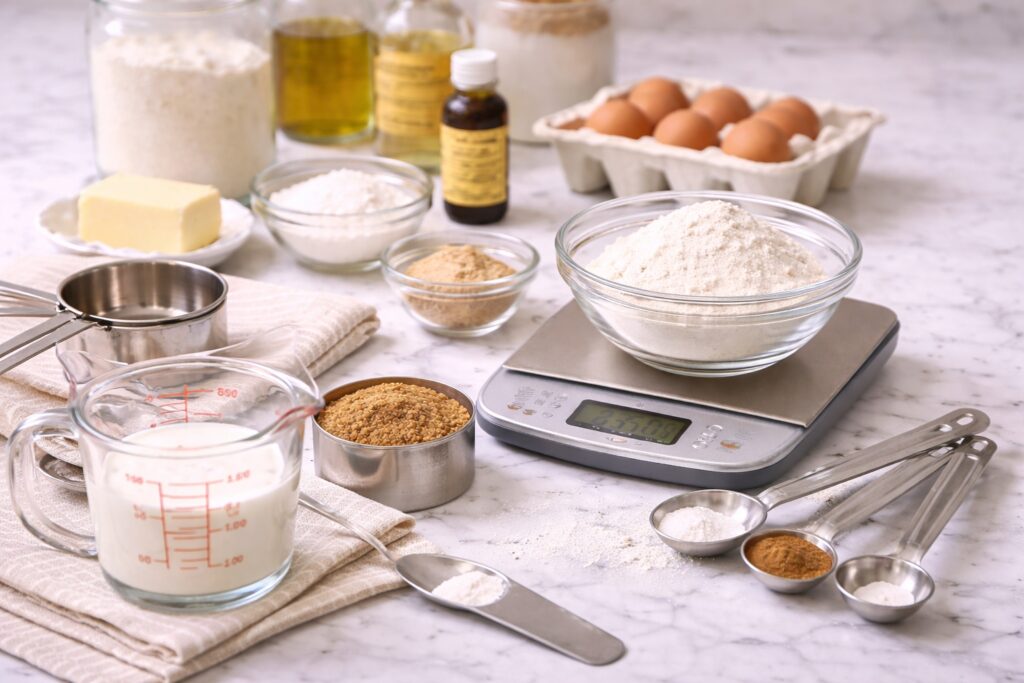
Volume vs Weight: The Accuracy Problem
One of the biggest reasons beginners struggle with consistency is relying only on measuring cups.
When you scoop flour directly from the bag, it compresses. That means one cup can contain very different amounts depending on how it was scooped.
For example:
• Scooped flour can weigh significantly more
• Spooned and leveled flour weighs less
• Weighed flour is exact every time
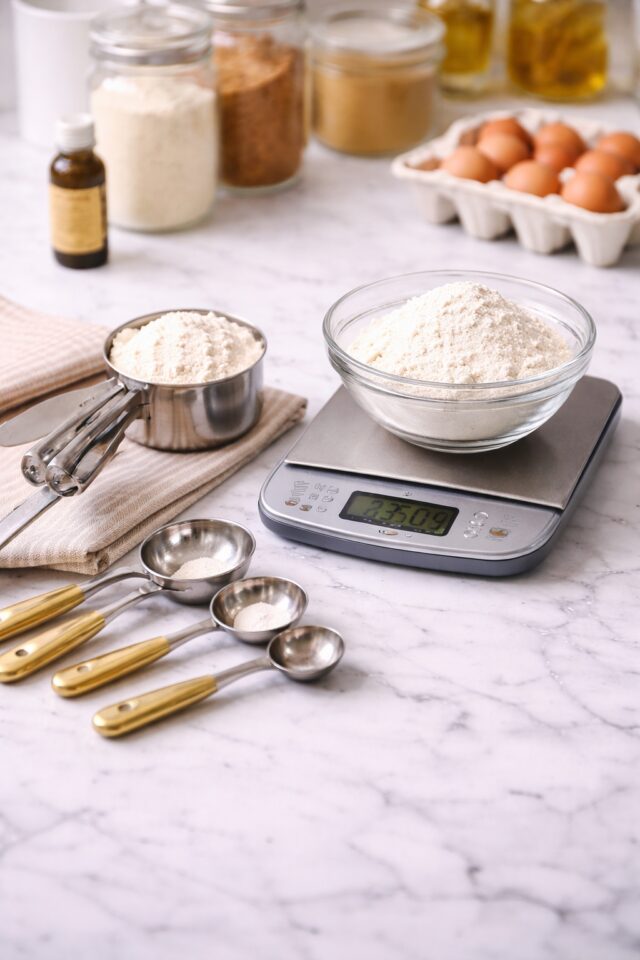
This is why a digital kitchen scale makes such a difference.
If you do not already have one, explore options here.
Look for a scale with a tare function so you can reset to zero after placing your bowl on top. That feature alone makes measuring much easier.
Weighing removes the guesswork. And removing guesswork builds confidence.
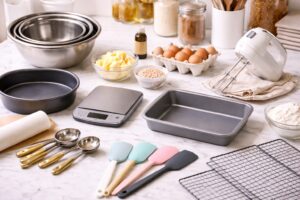
The Role of Proper Measuring Tools
Using the correct tool for each type of ingredient matters more than people think.
Dry ingredients should be measured in dry measuring cups, which allow you to level off excess cleanly.
Explore dry measuring cup sets here.
Liquid ingredients should be measured in a clear liquid measuring cup with a spout, placed on a flat surface and read at eye level.
Explore liquid measuring cups here.
For small ingredients like baking powder and salt, precise measuring spoons are essential.
Explore metal measuring spoons here.
Metal spoons tend to hold their shape better than plastic and provide more consistent measurements over time.
Consistency Builds Confidence
Here is something that does not get talked about enough.
When your bakes turn out differently every time, it feels frustrating. You start doubting yourself. You wonder if you are doing something wrong.
Accurate measuring changes that.
When you measure correctly:
• Recipes behave predictably
• Texture improves
• Rise becomes consistent
• Flavour stays balanced
And suddenly baking feels calm instead of stressful.
That is why mastering measuring is not just about numbers. It is about building trust in yourself and in the process.
In the next section, we will break down measuring by weight versus measuring by volume so you can decide which method works best for you.
Measuring by Weight vs Measuring by Volume
One of the biggest upgrades you can make in your baking is understanding the difference between measuring by weight and measuring by volume.
Both methods are common. But they are not equal.
Measuring by volume means using cups and spoons. Measuring by weight means using grams or ounces on a scale. The method you choose can significantly affect how consistent your results are.
What Is Measuring by Volume?
Measuring by volume means filling a cup or spoon to a specific level.
For example:
1 cup of flour
1 cup of sugar
1 teaspoon of baking powder
The challenge with volume measuring is that dry ingredients can compress. Flour is the biggest example. If you scoop it directly from the bag, you pack it down. If you spoon it gently into the cup, you get less. That means two people can measure “1 cup of flour” and end up with different actual amounts.
If you are using volume measurements, you need proper dry measuring cups that allow you to level off the top cleanly.
Explore dry measuring cup sets here.
For small quantities like baking powder, salt, or spices, a sturdy set of measuring spoons is essential.
Explore metal measuring spoons here.
Volume measuring can absolutely work. You just need to use the correct technique, which we will cover next.
What Is Measuring by Weight?
Measuring by weight means placing your bowl on a digital scale and weighing ingredients in grams or ounces.
This method removes all the guesswork.
Flour cannot accidentally compact. Sugar cannot settle differently. You are measuring the exact amount the recipe intends.
This is why many professional bakers prefer weighing. It gives repeatable, reliable results every time.
If you do not yet own one, a digital kitchen scale is one of the best investments you can make as a beginner.
Explore digital kitchen scales here.
Look for a scale with a tare function. This allows you to place your bowl on the scale, press reset to zero, and then add each ingredient directly into the same bowl without doing complicated calculations.
It makes baking simpler, not harder.
Which Method Is Better?
If a recipe provides measurements in grams, weighing is always the most accurate option.
If a recipe uses cups, you can still get excellent results by using the correct spoon and level method and proper tools.
The most important thing is consistency.
Choose one method, use it correctly, and repeat it the same way every time.
When your measurements are consistent, your cakes rise properly. Your cookies bake evenly. Your brownies have the right texture.
And that is when baking starts to feel predictable in the best possible way.
In the next section, we will focus specifically on flour, because it is the ingredient most often measured incorrectly.
How to Measure Flour Properly
If there is one ingredient that causes the most baking frustration, it is flour.
Too much flour is the number one reason cakes turn out dry, cookies turn out cakey instead of chewy, and muffins feel dense rather than light.
The tricky part is this.
Flour is very easy to measure incorrectly.
The Most Common Mistake
Scooping your measuring cup directly into the flour bag.
When you scoop, you compact the flour. That means you can accidentally add significantly more than the recipe intended. Even an extra few tablespoons can change the texture of a cake.
The result?
Heavy crumb. Dry texture. Disappointment.
The good news is that this is easy to fix.
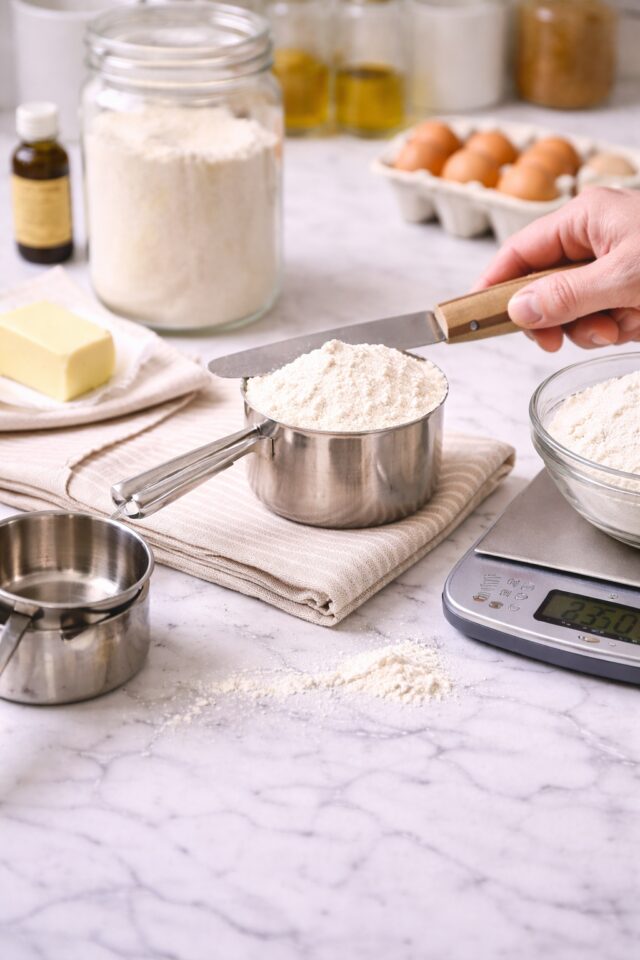
The Correct Way to Measure Flour Using Cups
If your recipe uses cups, follow this method:
- Fluff the flour in the container first with a spoon. This loosens any compaction.
- Spoon the flour gently into your dry measuring cup. Do not scoop.
- Fill until slightly overflowing.
- Level off the top with a straight edge.
A simple dough scraper or the back of a knife works perfectly for leveling.
Using proper dry measuring cups also makes a big difference because they are designed to be leveled cleanly.
Explore dry measuring cups here.
This method gives you far more accurate results than scooping directly.
The Most Accurate Way to Measure Flour
Weigh it.
Using a digital kitchen scale removes all guesswork. You simply place your bowl on the scale, press tare to reset to zero, and add flour until you reach the exact gram measurement in the recipe.
Explore digital kitchen scales here.
When you weigh flour, you eliminate:
• Compaction issues
• Inconsistent scooping
• Guesswork
And suddenly your cakes rise properly. Your cookies spread the way they should. Your traybakes have the right crumb.
If you want more predictable results, this is the single biggest upgrade you can make.
In the next section, we will look at how to measure sugar correctly, because brown sugar in particular behaves very differently from flour.
How to Measure Sugar Properly
Sugar may seem straightforward, but different types behave very differently in baking. Measuring them correctly helps control texture, moisture, and structure.
The key is understanding that not all sugar is measured the same way.
How to Measure Granulated Sugar
Granulated sugar is simple.
Unlike flour, it does not compress easily. You can scoop it directly into your measuring cup and level it off with a straight edge.
Still, accuracy matters.
If you want consistent results every time, weighing is the most reliable method.
Explore digital kitchen scales here.
If measuring by cups, use proper dry measuring cups so you can level cleanly.
Explore dry measuring cups here.
Level the top with a knife or dough scraper to remove excess.
How to Measure Brown Sugar
Brown sugar is different.
Because it contains molasses, it holds moisture and clumps together. That means it must be packed into the measuring cup unless the recipe says otherwise.
Here is the correct method:
- Spoon brown sugar into your measuring cup.
- Press it down firmly with the back of a spoon.
- Continue filling and pressing until the cup is full.
- Level the top.
When you turn it out, it should hold the shape of the cup.
Packing removes air pockets and ensures you are using the correct amount. If you do not pack it, you will end up with too little sugar, which can affect moisture and texture.
Using sturdy measuring cups makes this process easier.
Explore measuring cup sets here.
Why Sugar Measurement Matters
Sugar does more than sweeten.
It affects:
• Moisture
• Spread in cookies
• Browning
• Tenderness
Too little sugar can make cakes dry and pale. Too much can cause excessive spreading in cookies.
Accurate measuring keeps everything balanced.
If you want truly consistent results, weighing both granulated and brown sugar is the most precise option. A scale removes the question of how firmly something was packed.
Explore digital kitchen scales here.
In the next section, we will look at liquid ingredients, because measuring liquids correctly is just as important and often misunderstood.
How to Measure Liquid Ingredients Properly
Measuring liquids seems simple, but it is one of the most common areas where beginners go wrong.
Using the wrong cup or checking measurements at the wrong angle can easily lead to too much or too little liquid, which directly affects texture and structure.
And in baking, balance matters.
Use the Right Tool for the Job
Dry measuring cups and liquid measuring cups are not interchangeable.
Dry measuring cups are meant to be filled to the top and leveled off. Liquid measuring cups are designed with extra space above the measurement line so liquids do not spill.
A proper liquid measuring cup usually has:
• A spout for pouring
• Clear measurement markings
• Space above the highest measurement line
Explore glass liquid measuring cups here.
Glass options are especially useful because you can see the measurement lines clearly from the side.
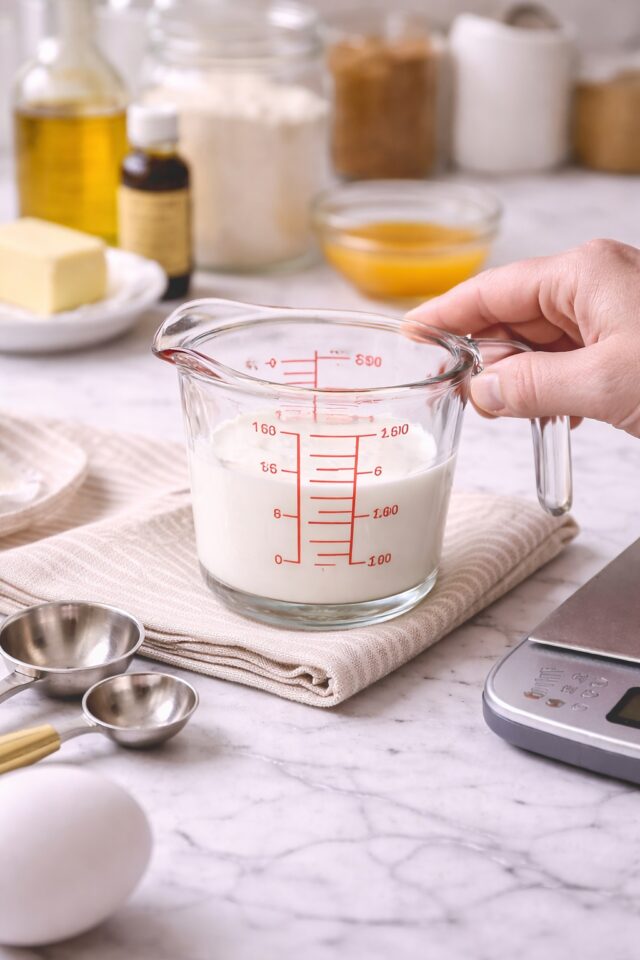
Always Measure at Eye Level
This is the step many people skip.
Place your liquid measuring cup on a flat surface. Bend down so your eyes are level with the measurement line. Check that the bottom of the liquid sits exactly on the correct marking.
Looking from above can make it appear fuller than it actually is. Looking from too low can make it seem underfilled.
That small visual difference can affect your final bake.
Weighing Liquids for Accuracy
Just like dry ingredients, liquids can also be weighed.
Water, milk, oil, and many other liquids can be measured in grams using a digital scale. This removes the need to check angles or worry about overfilling.
Explore digital kitchen scales here.
Using the tare function makes it simple. Place your bowl on the scale, reset to zero, and pour until you reach the correct weight.
It is clean, precise, and consistent.
Why Liquid Accuracy Matters
Too much liquid can cause:
• Dense or gummy texture
• Cakes that sink
• Muffins that do not hold structure
Too little liquid can cause:
• Dry crumb
• Cracked surfaces
• Heavy texture
Liquids interact with flour and sugar to create structure and tenderness. When the balance is right, everything works together beautifully.
In the next section, we will focus on small but powerful ingredients like baking powder, baking soda, and salt, because even tiny measurement mistakes can make a big difference.
How to Measure Small Ingredients Accurately
Small ingredients may not look important, but they have a powerful impact on your baking.
Baking powder, baking soda, salt, and spices are used in tiny quantities, yet even a slight measuring mistake can affect rise, flavour, and texture.
When it comes to these ingredients, precision really matters.
Use Proper Measuring Spoons
Teaspoons and tablespoons from your cutlery drawer are not reliable. They vary in size and shape, which can lead to inconsistent results.
Instead, use a proper set of measuring spoons that are clearly labeled and designed for accuracy.
Explore metal measuring spoons here.
Metal spoons tend to hold their shape better over time and provide more consistent measurements than plastic.
Always Level, Never Heap
When measuring baking powder, baking soda, or salt:
- Scoop the ingredient into the measuring spoon.
- Slightly overfill it.
- Level it off with a straight edge.
A knife or dough scraper works perfectly for this.
Heaping a teaspoon of baking powder might not look like much, but it can cause cakes to rise too quickly and then collapse. Too much baking soda can leave a bitter taste.
Leveling ensures accuracy every time.
Why Precision Is So Important
Raising agents control structure.
Too much baking powder can cause:
• Large uneven holes
• Bitter aftertaste
• Cakes that sink in the middle
Too little can result in:
• Dense crumb
• Flat texture
• Poor rise
Salt and spices affect flavour balance. Even a small over-measurement can overpower a recipe.
Because these ingredients are used in such small amounts, using the correct spoon and leveling properly makes a noticeable difference.
Weighing Small Ingredients
If your recipe provides measurements in grams, weighing is even more precise.
A digital kitchen scale allows you to measure small quantities accurately, especially when baking frequently.
Explore digital kitchen scales here.
Using the tare function makes it simple and clean.
Mastering these small measurements is what takes your baking from unpredictable to reliable.
In the next section, we will look at the most common measuring mistakes beginners make and how to avoid them completely.
Common Measuring Mistakes Beginners Make (And How to Avoid Them)
Even with the right tools, small habits can quietly sabotage your results.
The good news is that most measuring mistakes are easy to fix once you know what to look for.
Let’s walk through the most common ones so you can avoid them completely.
Scooping Flour Directly From the Bag
This is by far the most common mistake.
Scooping compacts the flour, which means you end up using more than the recipe intended. Even an extra few tablespoons can make cakes dry and cookies dense.
Instead, spoon flour gently into your measuring cup and level it off. Or better yet, weigh it.
Explore digital kitchen scales here.
Consistency starts here.
Using the Wrong Measuring Cup
Dry measuring cups and liquid measuring cups are not the same.
Using a dry cup for liquids can lead to overfilling. Using a liquid cup for dry ingredients makes leveling difficult.
Make sure you have both.
Explore dry measuring cups here.
Explore liquid measuring cups here.
The right tool makes measuring simpler and more accurate.
Not Measuring at Eye Level
When measuring liquids, looking down from above can make the level appear higher than it actually is.
Always place the cup on a flat surface and check at eye level. It takes seconds and prevents small but important errors.
Guessing Instead of Leveling
Heaping teaspoons of baking powder. Rounded cups of flour. Eyeballing half a tablespoon.
These tiny shortcuts add up.
Use proper measuring spoons and level everything carefully.
Explore metal measuring spoons here.
Leveling takes only a moment, but it protects your entire recipe.
Forgetting to Use the Tare Function
If you are using a digital scale, always reset to zero after placing your bowl on top.
This is called the tare function.
Without it, you may accidentally include the weight of the bowl in your measurement, which throws everything off.
Explore digital kitchen scales with tare function here.
It is a small button that makes a big difference.
Not Checking Your Oven Temperature
This is slightly beyond measuring, but it affects results just as much.
If your oven runs hotter or cooler than the dial suggests, your carefully measured ingredients may still bake differently than expected.
An oven thermometer gives you the true temperature inside your oven.
Explore oven thermometers here.
Accurate temperature plus accurate measuring equals predictable results.
Rushing the Process
Baking is not complicated, but it does reward patience.
Taking a few extra seconds to measure carefully, level properly, and double check quantities builds reliability. And reliability builds confidence.
The goal is not perfection.
It is consistency.
Once you remove these common mistakes, your baking becomes calmer, easier, and far more predictable.
In the final section, we will pull everything together into a simple measuring checklist you can use every time you bake.
Quick Measuring Checklist for Perfect Bakes
By now, you can see that measuring properly is not complicated.
It is simply about being consistent.
If you ever feel unsure, use this quick checklist before you start baking. It takes less than a minute to run through and can save an entire recipe.
Before You Start
• Read the recipe fully
• Check whether ingredients are listed in cups or grams
• Gather the correct measuring tools
Having everything ready prevents rushed, inaccurate measuring.
If you are weighing ingredients, place your bowl on your digital scale and press tare before adding anything.
Explore digital kitchen scales here.
When Measuring Flour
• Fluff the flour first
• Spoon into the measuring cup
• Level with a straight edge
• Or weigh in grams for best accuracy
Never scoop directly from the bag.
When Measuring Sugar
• Granulated sugar can be scooped and leveled
• Brown sugar must be packed firmly unless stated otherwise
• Level off the top
Using proper measuring cups makes this much easier.
Explore measuring cup sets here.
When Measuring Liquids
• Use a liquid measuring cup
• Place it on a flat surface
• Check the level at eye height
• Or weigh liquids for extra accuracy
Explore glass liquid measuring cups here.
When Measuring Small Ingredients
• Use proper measuring spoons
• Slightly overfill
• Level cleanly
• Never heap
Explore metal measuring spoons here.
Tiny ingredients make a big difference.
Final Confidence Reminder
Accurate measuring does not make baking complicated.
It makes baking predictable.
When your ingredients are measured properly, recipes behave the way they are meant to. Cakes rise evenly. Cookies spread just enough. Traybakes have the perfect crumb.
That consistency builds confidence.
And confidence is what turns a beginner into a happy home baker.
Ready to put this into practice?
Try your first simple bake and focus on measuring carefully. You will be amazed at how much difference it makes.
Ready to Put This Into Practice?
Now that you know how to measure ingredients properly, it is time to use that skill.
Choose something simple and confidence building. Focus on weighing carefully, leveling properly, and following the steps slowly.
👉 Try this first: Easy Vanilla Cake for Beginners
Pay attention to how much smoother the process feels when your measurements are accurate. You will notice the difference in texture, rise, and overall consistency straight away.
Want to Improve Even More?
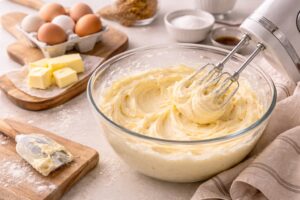
Measuring is one of the most powerful foundational skills in baking. The next technique that makes a real difference is learning how to cream butter and sugar properly.
When you master both of these skills, your cakes become lighter, your cookies bake more evenly, and your results become beautifully reliable.
👉 Read next: How to Cream Butter and Sugar for Perfect Cakes
These small improvements build real confidence in the kitchen.
Missing the Right Measuring Tools?
If you are still building your kitchen setup or want to double check you have the right essentials, I have shared the exact beginner tools I recommend.
👉 See the full guide here: Essential Baking Equipment for Beginners
With the right tools and proper measuring, baking becomes simple, predictable, and genuinely enjoyable.
Now preheat your oven and let’s bake something wonderful.