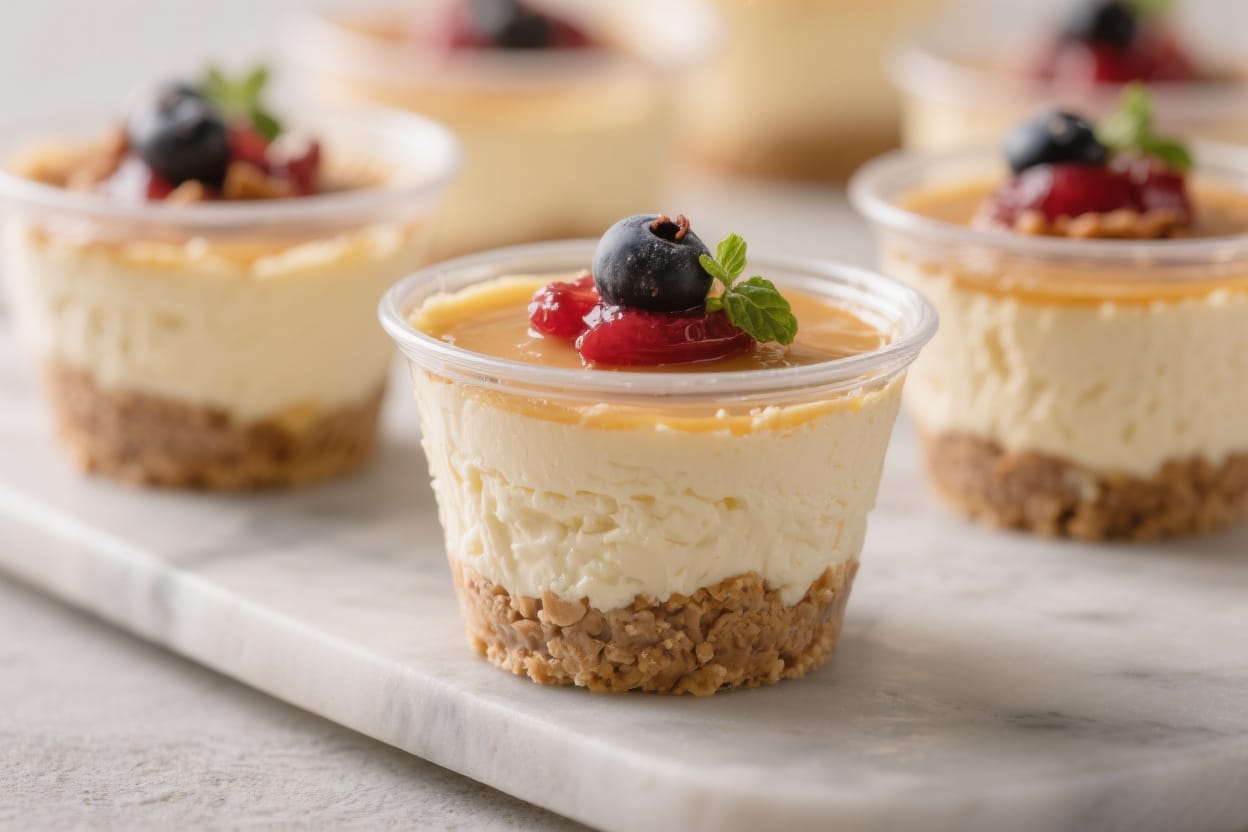
No bake cheesecake cups are the kind of dessert that makes any day feel a little special. They’re creamy, lightly sweet, and come together without turning on the oven. Even better, they’re easy to customize with your favorite toppings—fresh berries, lemon curd, chocolate, or a drizzle of caramel.
Make them for a dinner party, a weekday treat, or portion-controlled desserts you can keep in the fridge. Simple steps, minimal effort, big reward.
No Bake Cheesecake Cups – Creamy, Quick, and Crowd-Pleasing
Ingredients
For the crust:
- 1 1/2 cups graham cracker crumbs about 10 full sheets
- 5 tablespoons unsalted butter melted
- 2 tablespoons granulated sugar optional, for extra sweetness
- Pinch of fine sea salt
For the cheesecake filling:
- 12 ounces cream cheese softened to room temperature
- 1 cup heavy whipping cream cold
- 1/2 cup powdered sugar add more to taste
- 1 teaspoon pure vanilla extract
- 1 teaspoon fresh lemon juice brightens the flavor
- Pinch of fine sea salt
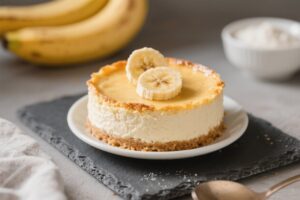
For topping (choose your favorites):
- Fresh berries strawberries, blueberries, raspberries
- Lemon curd or fruit compote
- Chocolate shavings or mini chips
- Caramel sauce or berry sauce
- Crushed cookies or nuts for crunch
Equipment:
- 6 –8 small glass jars ramekins, or sturdy cups
- Hand mixer or stand mixer
- Mixing bowls and spatula
Instructions
- Make the crust: In a bowl, combine graham cracker crumbs, melted butter, sugar, and salt. Mix until the texture resembles damp sand and holds together when pressed.
- Portion the crust: Spoon 2–3 tablespoons of the crumb mixture into each cup. Press firmly with the back of a spoon or a small glass to create an even base. Set aside.
- Whip the cream: In a cold bowl, beat the heavy cream to stiff peaks. Don’t overbeat—stop when it’s thick and holds its shape. Set aside.
- Blend the cream cheese: In a separate bowl, beat the softened cream cheese until very smooth, about 1–2 minutes. Add powdered sugar, vanilla, lemon juice, and salt. Beat again until light and fluffy.
- Fold gently: Add one-third of the whipped cream to the cream cheese mixture and fold to lighten. Add the rest and fold until no streaks remain. Keep it airy to stay fluffy.
- Fill the cups: Spoon or pipe the cheesecake filling over the crusts, dividing evenly between cups. Smooth the tops with a spoon or small offset spatula.
- Chill: Cover and refrigerate for at least 2 hours, or up to 24 hours. This helps the texture set and the flavors meld.
- Top and serve: Just before serving, add your favorite toppings. Keep it simple with berries, or go richer with caramel and chocolate.
What Makes This Recipe So Good
- No baking required: Perfect for warm days, busy schedules, or small kitchens without an oven.
- Fast and foolproof: The filling mixes up in minutes, and the cups set quickly in the fridge.
- Single-serve portions: Built-in portion control and easy serving—no slicing or plating stress.
- Endlessly customizable: Change the crust, the sweetener, or the toppings to suit your taste.
- Make-ahead friendly: They keep well, so you can prep them the day before you need them.
Ingredients
- For the crust:
- 1 1/2 cups graham cracker crumbs (about 10 full sheets)
- 5 tablespoons unsalted butter, melted
- 2 tablespoons granulated sugar (optional, for extra sweetness)
- Pinch of fine sea salt
- For the cheesecake filling:
- 12 ounces cream cheese, softened to room temperature
- 1 cup heavy whipping cream, cold
- 1/2 cup powdered sugar (add more to taste)
- 1 teaspoon pure vanilla extract
- 1 teaspoon fresh lemon juice (brightens the flavor)
- Pinch of fine sea salt
- For topping (choose your favorites):
- Fresh berries (strawberries, blueberries, raspberries)
- Lemon curd or fruit compote
- Chocolate shavings or mini chips
- Caramel sauce or berry sauce
- Crushed cookies or nuts for crunch
- Equipment:
- 6–8 small glass jars, ramekins, or sturdy cups
- Hand mixer or stand mixer
- Mixing bowls and spatula
Instructions
- Make the crust: In a bowl, combine graham cracker crumbs, melted butter, sugar, and salt. Mix until the texture resembles damp sand and holds together when pressed.
- Portion the crust: Spoon 2–3 tablespoons of the crumb mixture into each cup.
Press firmly with the back of a spoon or a small glass to create an even base. Set aside.
- Whip the cream: In a cold bowl, beat the heavy cream to stiff peaks. Don’t overbeat—stop when it’s thick and holds its shape.
Set aside.
- Blend the cream cheese: In a separate bowl, beat the softened cream cheese until very smooth, about 1–2 minutes. Add powdered sugar, vanilla, lemon juice, and salt. Beat again until light and fluffy.
- Fold gently: Add one-third of the whipped cream to the cream cheese mixture and fold to lighten.
Add the rest and fold until no streaks remain. Keep it airy to stay fluffy.
- Fill the cups: Spoon or pipe the cheesecake filling over the crusts, dividing evenly between cups. Smooth the tops with a spoon or small offset spatula.
- Chill: Cover and refrigerate for at least 2 hours, or up to 24 hours.
This helps the texture set and the flavors meld.
- Top and serve: Just before serving, add your favorite toppings. Keep it simple with berries, or go richer with caramel and chocolate.
Keeping It Fresh
- Storage: Cover the cups tightly and refrigerate for up to 4 days. Add fresh fruit right before serving so it doesn’t weep onto the cheesecake.
- Freezing: You can freeze the cups (without fruit topping) for up to 2 months.
Wrap well. Thaw overnight in the fridge. The texture stays surprisingly smooth.
- Make-ahead tip: Prepare crusts and filling the day before, store separately, then assemble the morning you plan to serve for the freshest look.
Why This is Good for You
- Portion control built in: Individual cups help keep servings reasonable and cut down on overeating.
- Balanced indulgence: Cream cheese gives protein and calcium, while berries add fiber and antioxidants.
- Less sugar if you want: Because the dessert isn’t baked, it doesn’t rely on high sugar to set.
You can adjust sweetness to taste.
- Gluten-free friendly: Swap in gluten-free cookies for the crust without changing the experience.
Pitfalls to Watch Out For
- Cold cream cheese: If it’s too cold, it won’t blend smooth and you’ll get lumps. Let it sit at room temperature for 30–60 minutes first.
- Overwhipped cream: If you beat past stiff peaks, it can turn grainy. Stop when it forms peaks that hold but still look silky.
- Watery toppings: Juicy fruits can leak into the filling.
Pat berries dry or spoon on just before serving.
- Skimping on the chill time: The filling needs time to firm up. Less than 2 hours can mean a loose texture.
- Crust not packed: If the crumbs are too loose, the base will fall apart. Press firmly into the cups.
Alternatives
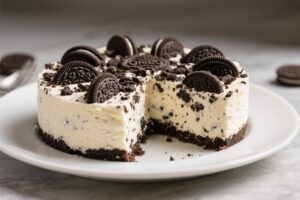
- Cookie crust swaps: Try Oreos (no extra sugar needed), vanilla wafers, gingersnaps, or digestive biscuits.
- Flavor twists: Add 1–2 teaspoons lemon zest to the filling, or fold in 2 tablespoons of seedless raspberry jam for a swirl.
- Chocolate version: Mix 2 tablespoons cocoa powder into the cream cheese and add an extra tablespoon of powdered sugar.
- Lightened-up: Use Neufchâtel cheese and swap half the heavy cream for Greek yogurt.
The texture is slightly tangier and still creamy.
- No-dairy path: Use dairy-free cream cheese and whipped coconut cream. Choose a plant-based butter for the crust.
- Low-sugar: Replace powdered sugar with a powdered erythritol blend and use a sugar-free cookie for the crust.
FAQ
Can I make these a day ahead?
Yes. In fact, they taste even better the next day.
Just add fresh fruit or sauce right before serving so the topping stays bright and fresh.
Do I need gelatin to set the filling?
No. The whipped cream folded into the cream cheese provides structure. Chilling firms it up without gelatin.
If you prefer extra firmness, you can add 1 teaspoon of powdered gelatin bloomed in 1 tablespoon of water and melted, then mix into the cream cheese.
What size cups should I use?
Four- to eight-ounce cups work best. Smaller cups make snack-size portions; larger ones feel more decadent. The recipe yields about 6–8 servings depending on cup size.
How do I avoid lumps in the filling?
Start with fully softened cream cheese and beat it smooth before adding sugar.
Scrape down the bowl a couple of times. Fold the whipped cream gently to keep it light and lump-free.
Can I use whipped topping instead of heavy cream?
You can. Substitute an equal volume of thawed whipped topping and skip the added sugar at first.
Taste and adjust sweetness if needed.
What if I don’t have graham crackers?
Use any crisp cookie: digestives, vanilla wafers, Biscoff, or even shortbread. Adjust added sugar depending on how sweet the cookie is.
Can I make this in a single large dish?
Yes. Press the crust into an 8×8-inch pan or a pie dish.
Add the filling and chill as directed. Slice carefully once set.
How long do they need to chill?
Aim for at least 2 hours. For the best texture, chill 4 hours or overnight.
The cups will hold their shape longer when fully set.
Wrapping Up
No bake cheesecake cups deliver everything you want from dessert with almost no fuss: a crunchy base, a silky filling, and a topping that fits your mood. They’re easy to prep, easy to serve, and easy to personalize. Keep a batch in the fridge for weeknight treats or make them ahead for gatherings.
Simple, creamy, and always a hit—these cups are the kind of recipe you’ll keep coming back to.