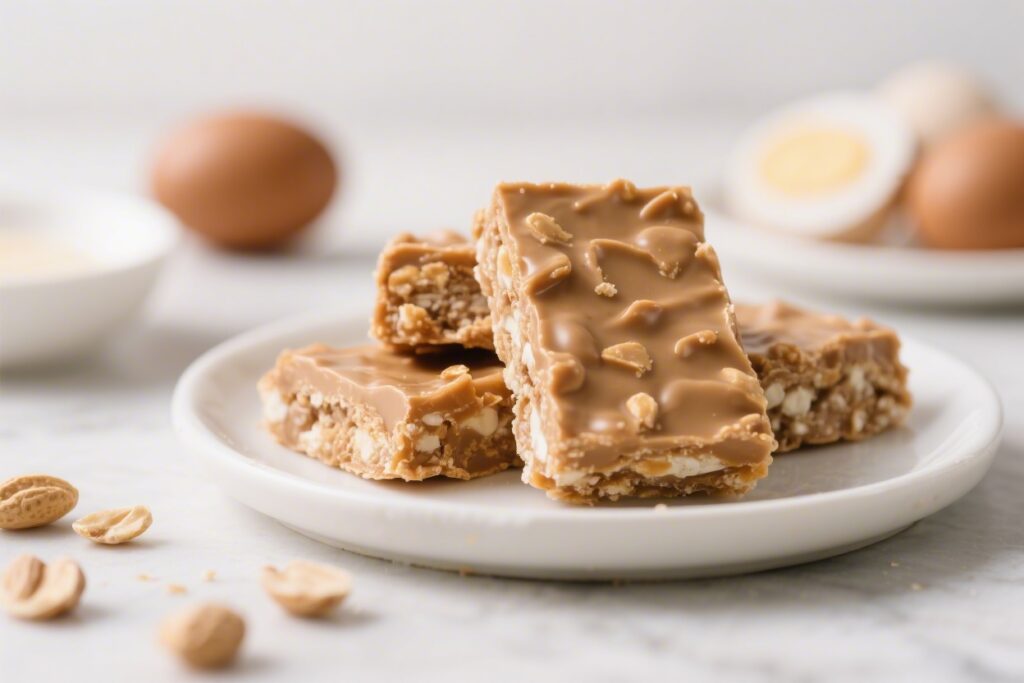
Craving something sweet, salty, and a little nostalgic? These No Bake Peanut Butter Egg Bars hit all the right notes without heating up the oven. They taste like those classic peanut butter eggs you find around springtime, but in an easy bar form you can make any time of year.
The texture is soft and fudgy with a delicate snap from the chocolate topping. They’re quick to pull together, simple to customize, and almost too easy to keep snacking on.
What Makes This Recipe So Good
- Zero baking required: Perfect for warm days or quick treats when you don’t want to turn on the oven.
- Familiar candy-shop flavor: The creamy peanut butter base topped with chocolate tastes just like peanut butter eggs.
- Fast to prepare: The base comes together in minutes. Chill, slice, and you’re done.
- Kid- and crowd-friendly: Sweet but not over-the-top, and easy to cut into small bites for sharing.
- Flexible ingredients: Use creamy or crunchy peanut butter, dairy-free chocolate, or gluten-free graham crumbs.
Ingredients
- Creamy peanut butter: The classic base.Use a no-stir variety for best texture. Natural peanut butter works with a slight adjustment (see Pitfalls).
- Unsalted butter: Helps bind and adds richness. You can swap with coconut oil for a dairy-free version.
- Powdered sugar: Sweetens and creates a fudge-like texture.
- Graham cracker crumbs: Add body and a gentle crunch.Use gluten-free crumbs if needed.
- Vanilla extract: Rounds out the flavor.
- Fine sea salt: Balances the sweetness and enhances the peanut flavor.
- Chocolate chips: Semi-sweet or milk chocolate both work. Choose dark for a less sweet top.
- Neutral oil or butter (for melting chocolate): Optional, for a smoother, softer set on the chocolate layer.
Instructions
- Prep your pan: Line an 8×8-inch baking pan with parchment paper, leaving overhang on two sides for easy lifting.
- Make the peanut butter base: In a medium saucepan over low heat, melt 1/2 cup unsalted butter with 1 cup creamy peanut butter, stirring until smooth. Remove from heat.
- Sweeten and thicken: Whisk in 1 teaspoon vanilla and a pinch (about 1/4 teaspoon) fine sea salt.Stir in 2 cups powdered sugar and 1 1/4 cups graham cracker crumbs until a thick, cohesive mixture forms. It should feel like soft cookie dough and pull away from the sides of the bowl.
- Press into pan: Spoon the mixture into the lined pan. Use a spatula or the bottom of a measuring cup to press it into an even layer.Aim for compact, flat edges to help the chocolate set evenly.
- Melt the chocolate: Place 1 1/2 cups chocolate chips with 1 tablespoon butter or neutral oil in a heatproof bowl. Microwave in 20–30 second bursts, stirring each time, until just melted and glossy. Alternatively, melt over a double boiler.
- Top and smooth: Pour the melted chocolate over the peanut butter layer.Tilt the pan and gently spread with an offset spatula to cover edge to edge.
- Chill to set: Refrigerate for 1–2 hours, until the chocolate is firm but sliceable. If you prefer a softer chocolate bite, pull the pan out around the 60-minute mark.
- Slice cleanly: Lift the slab out using the parchment overhang. Warm a sharp knife under hot water, dry it, and cut into bars.Wipe the blade between cuts for neat edges.
- Serve or store: Enjoy right away, or keep chilled until serving to keep those layers tidy.
How to Store
- Refrigerator: Store in an airtight container for up to 1 week. Separate layers with parchment if stacking.
- Freezer: Freeze for up to 2 months. Wrap the slab or individual bars well, then place in a freezer bag.Thaw in the fridge for best texture.
- Room temperature: If your kitchen is cool, bars can sit out for a few hours. Warm rooms may cause the chocolate to soften and smudge.
Benefits of This Recipe
- Time-saving: Minimal prep and no bake time mean treats are ready quickly.
- Budget-friendly: Pantry staples keep costs low, and the recipe makes plenty of servings.
- Customizable sweetness: You can lean darker with chocolate or reduce powdered sugar slightly if you prefer less sweet.
- Easy to scale: Double for a 9×13-inch pan or halve for a smaller batch.
- Great for gifting and gatherings: Slices stay neat and travel well when chilled.
Pitfalls to Watch Out For
- Using very runny natural peanut butter: If your PB separates and is oily, stir it thoroughly. You may need 2–4 extra tablespoons of graham crumbs or powdered sugar to keep the base firm.
- Overheating the chocolate: Chocolate can seize or turn grainy.Melt gently in short bursts and stir often.
- Cutting when too cold: Rock-hard chocolate can crack. Let the pan sit at room temp 5–10 minutes, then use a warm knife.
- Skipping the salt: That pinch makes the peanut flavor pop and keeps the sweetness balanced.
- Uneven pressing: Thick or thin spots make slicing tricky. Take a minute to level the base before topping.
Variations You Can Try
- Crunchy swirl: Use half crunchy peanut butter and fold in 1/4 cup chopped roasted peanuts.
- Dark chocolate sea salt: Top with 70% dark chocolate and finish with a light sprinkle of flaky salt.
- Gluten-free: Swap graham crumbs for gluten-free graham crackers or fine almond flour (start with 1 cup and adjust).
- Maple-kissed: Add 1–2 tablespoons pure maple syrup to the base and reduce powdered sugar slightly.
- Dairy-free/vegan: Use dairy-free butter or coconut oil, plus vegan chocolate chips.
- Peanut-free: Try almond butter, cashew butter, or sunflower seed butter for a nut-free school-safe option.
- Layered crunch: Sprinkle crushed pretzels over the peanut layer before pouring on the chocolate.
- Marble top: Reserve 2 tablespoons peanut butter, warm it, and drizzle over melted chocolate.Swirl with a toothpick.
FAQ
Can I make these without graham cracker crumbs?
Yes. Use crushed digestive biscuits, vanilla wafers, or fine almond flour. Start with slightly less than the full amount and add until the base feels thick and moldable.
How do I keep the chocolate layer from separating?
Press the peanut layer firmly so it’s compact and flat, and make sure it’s not slick with excess oil.
Adding 1 tablespoon butter or neutral oil to the chocolate helps it adhere and slice more cleanly.
Can I cut back on the sugar?
You can reduce powdered sugar by about 1/4–1/3 cup without losing structure. If the base feels too soft, add a bit more graham crumbs to compensate.
What size pan works best?
An 8×8-inch pan gives you a nice thickness and candy-bar feel. For thinner bars, use a 9×9-inch pan.
Double the recipe for a 9×13-inch pan.
Why is my base crumbly?
It likely needs more moisture or mixing. Work it a bit longer to hydrate the crumbs, or add 1–2 tablespoons melted butter or peanut butter until it holds together like soft dough.
How do I get clean slices?
Chill until set, then warm your knife under hot water, dry it, and cut with steady pressure. Wipe the blade between cuts to keep edges sharp.
Can I add protein powder?
Yes.
Replace up to 1/4 cup of the powdered sugar or graham crumbs with a neutral or vanilla protein powder. You may need an extra spoon of peanut butter if the mixture seems dry.
Wrapping Up
No Bake Peanut Butter Egg Bars bring the best parts of candy-shop treats to your own kitchen with barely any effort. The layers are simple, the flavor is nostalgic, and the method couldn’t be easier.
Keep a batch in the fridge for quick desserts, lunchbox surprises, or last-minute guests. Once you master the base, the variations are endless—and every version tastes like a win.