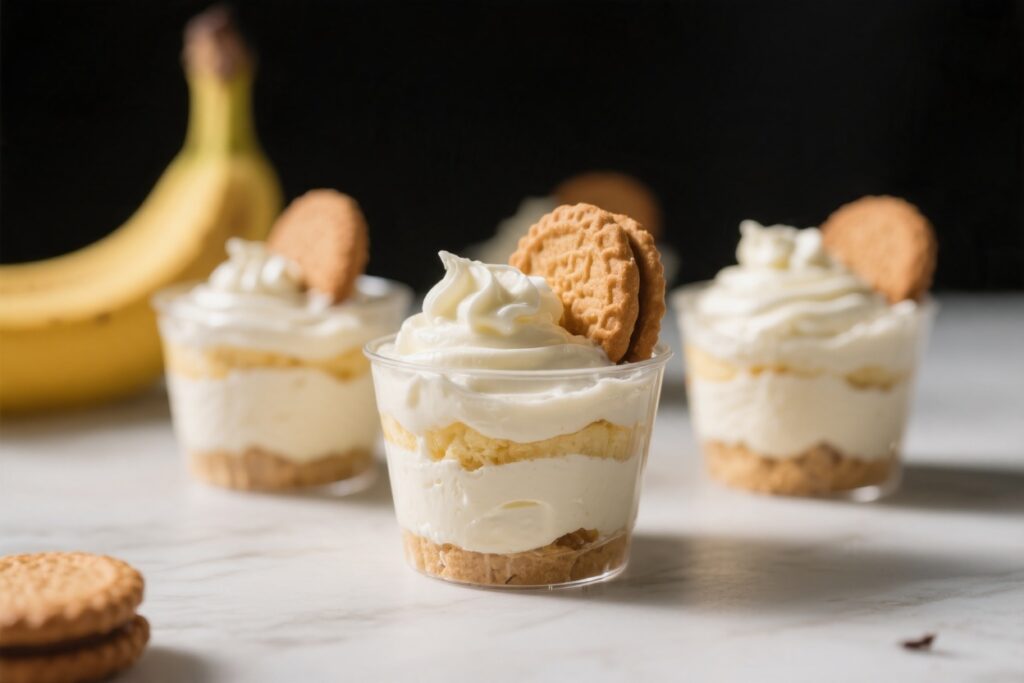
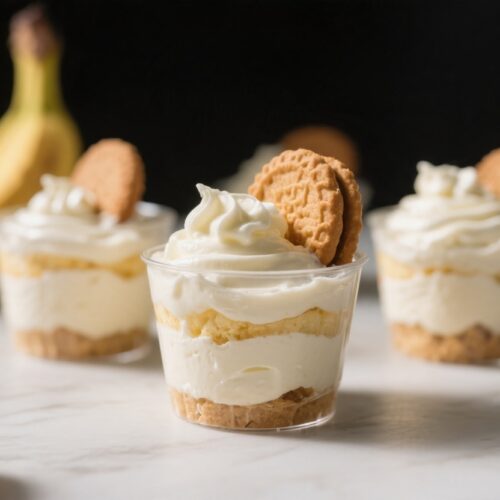
If you need a nostalgic dessert that takes minimal effort, these banana pudding dessert cups are a winner. They’re creamy, layered with vanilla wafers, and ready in a fraction of the time it takes to make a full trifle. You can prep them ahead, serve them in individual cups, and watch them disappear at any gathering.
The flavor is classic and familiar, with a soft, spoonable texture that feels like comfort in a cup. Best of all, the ingredients are easy to find, and the method is foolproof.
Why This Recipe Works
- Simple ingredients, big flavor: Instant pudding, bananas, and vanilla wafers do most of the heavy lifting. A touch of vanilla and whipped cream adds richness.
- Perfect texture layers: Crunchy wafers soften just enough against the pudding and banana slices, creating a silky, scoopable bite.
- Quick assembly: No baking and minimal prep.
You can build, chill briefly, and serve.
- Make-ahead friendly: The cups actually taste better after a short chill, as the flavors meld.
- Easy to scale: Whether you’re feeding four or forty, this recipe doubles or halves without fuss.
How to Store
- Refrigeration: Cover cups tightly and refrigerate for up to 2 days.
The wafers will continue to soften over time.
- Banana browning: To minimize browning, assemble no more than a day ahead and avoid placing banana slices on top until serving.
- Freezing: Not recommended. The pudding can separate and bananas turn mushy after thawing.
- Meal prep tip: Store extra sliced bananas separately with a light lemon-water rinse and add them fresh to the top before serving.
Health Benefits
- Potassium and fiber: Bananas provide potassium to support heart and muscle function, plus fiber for digestion.
- Calcium and protein: Milk and cream contribute calcium, and using milk adds a bit of protein to each serving.
- Portion control: Individual cups help manage serving size, which can be useful for mindful eating.
- Customization: You can lighten the recipe by using low-fat milk, reduced-sugar pudding, or a smaller amount of whipped topping.
Common Mistakes to Avoid
- Overripe bananas: Very brown bananas taste great in bread but can turn mushy and overly sweet in pudding cups.
- Skipping the chill: A quick chill sets the layers and softens the wafers slightly. Serving right away can taste disjointed.
- Overwhipping cream: Grainy or butter-like whipped cream won’t fold smoothly into the pudding.
Stop at medium peaks.
- Too much lemon juice: A light brush helps with browning, but excess can add a sour note. Use sparingly and blot.
- Soggy wafers: If you prefer more crunch, add a few fresh wafers just before serving instead of layering all at once.
Variations You Can Try
- Chocolate twist: Use chocolate pudding or add a thin drizzle of chocolate sauce between layers.
- Peanut butter banana: Whisk a few tablespoons of creamy peanut butter into the pudding or drizzle warm peanut butter between layers.
- Lightened-up version: Choose sugar-free pudding, 2% milk, and a lighter whipped topping. Use fewer wafers per cup.
- Caramel banana: Add a drizzle of caramel sauce and a pinch of sea salt to each layer.
- Berry boost: Add sliced strawberries or blueberries for a fresh, tart contrast.
- Graham swap: Replace vanilla wafers with graham crackers or butter cookies for a different crunch.
- Boozy adult version: Brush wafers lightly with coffee liqueur or bourbon before layering.
Use sparingly.
Easy Banana Pudding Dessert Cups with Vanilla Wafers – Creamy, Classic, and Quick
Ingredients
- Instant vanilla pudding mix (two 3.4-ounce boxes or one 5.1-ounce box, depending on yield)
- Cold milk (whole or 2% for best texture)
- Heavy whipping cream (or a tub of whipped topping for convenience)
- Vanilla extract (optional, for extra depth)
- Bananas (ripe but firm; no large brown patches)
- Vanilla wafers (classic Nilla-style cookies)
- Powdered sugar (if whipping your own cream)
- Lemon juice (optional, to lightly brush bananas and slow browning)
- Mini dessert cups or small jars (6–10 ounces each, clear if possible for pretty layers)
Instructions
- Chill your tools: Place a mixing bowl and beaters in the fridge for 10 minutes if you’re making fresh whipped cream. Cold tools whip faster and create better volume.
- Make the pudding: In a large bowl, whisk instant vanilla pudding mix with cold milk according to package directions. Stir in 1 teaspoon vanilla extract if using.Let it thicken for 5 minutes.
- Whip the cream (if not using whipped topping): Beat heavy cream with 1–2 tablespoons powdered sugar until medium peaks form. Don’t overwhip. Set aside.
- Lighten the pudding: Fold half of the whipped cream (or an equal amount of whipped topping) into the pudding to make it extra creamy.Reserve the rest for topping.
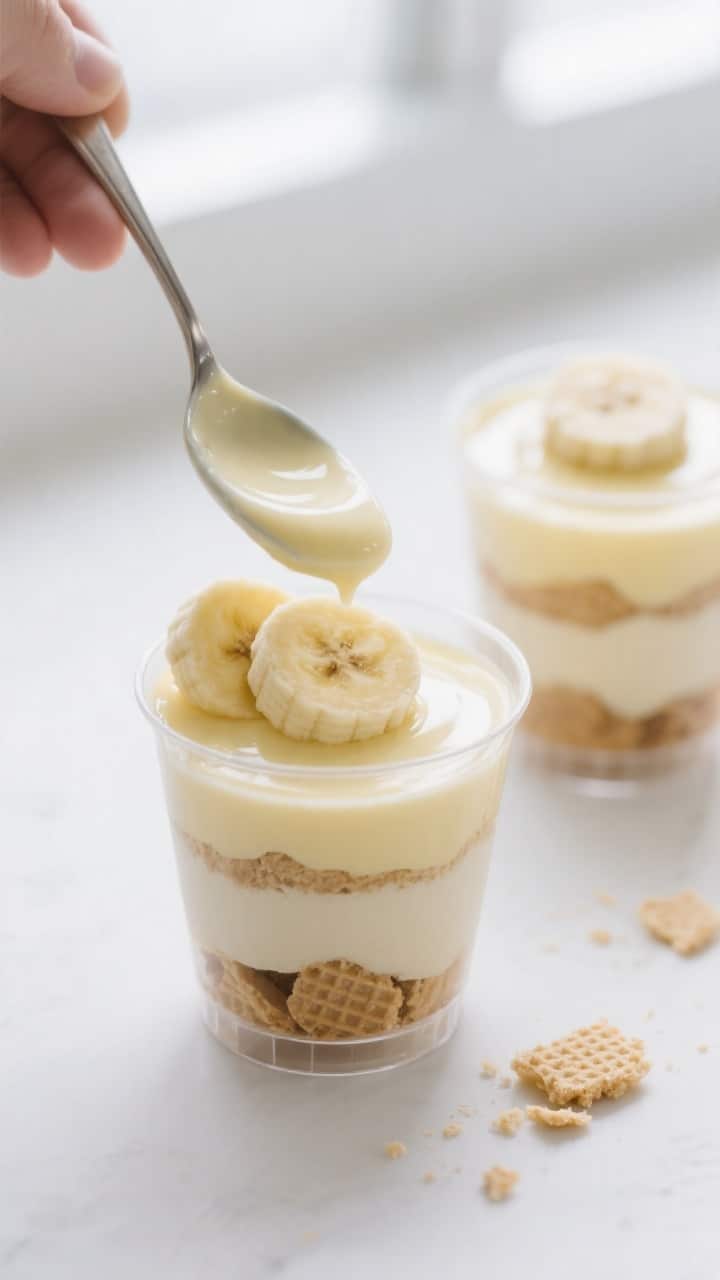
- Prep the bananas: Peel and slice bananas into 1/4-inch rounds. If desired, lightly brush with lemon juice to slow browning. Blot any excess to avoid a sour taste.
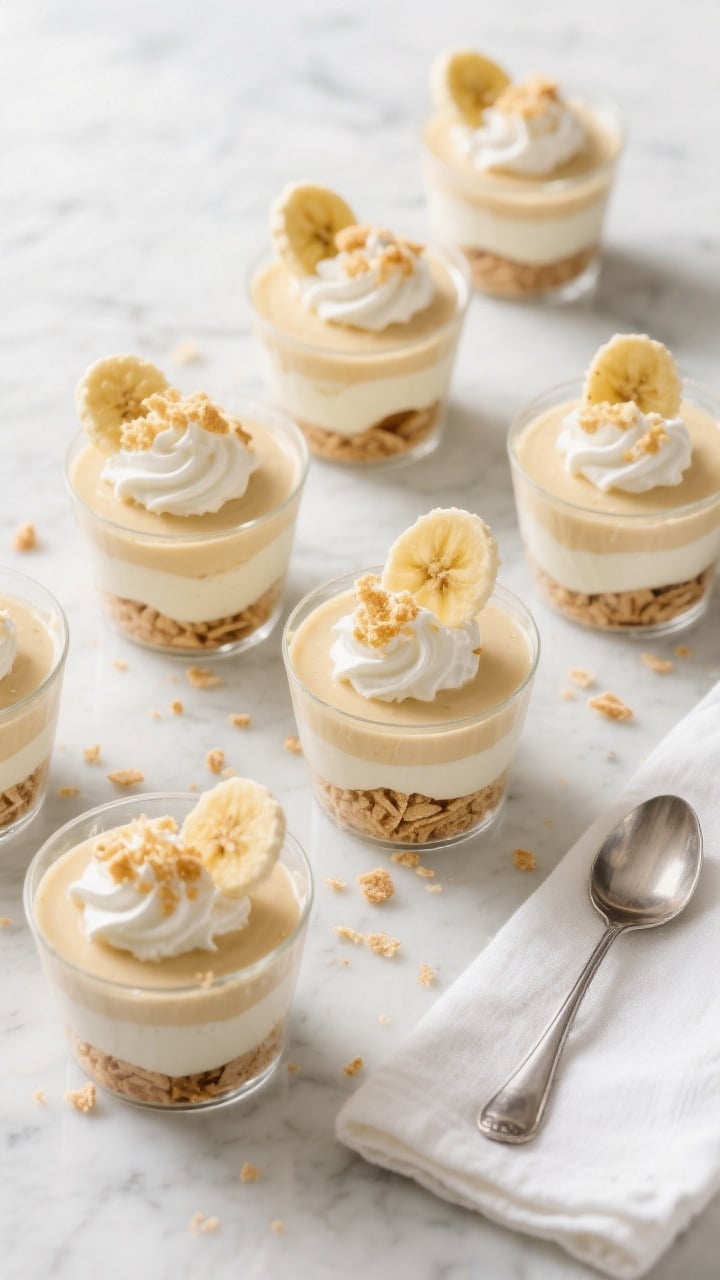
- Layer the cups: Add a few vanilla wafers to the bottom of each cup, breaking them if needed to fit.Spoon a layer of pudding over the wafers, then add a layer of banana slices.
- Repeat: Continue layering wafers, pudding, and bananas until cups are nearly full. End with pudding for a smooth top.
- Top and garnish: Add a dollop of the remaining whipped cream or whipped topping. Crumble a few wafers or place one whole wafer on top.Add a fresh banana slice right before serving, if desired.
- Chill: Refrigerate at least 30–60 minutes to let the flavors meld and wafers soften slightly. For softer wafers, chill 2–4 hours.
- Serve: Keep chilled until ready to eat. Enjoy straight from the cup with a spoon.
FAQ
Can I make these banana pudding cups a day ahead?
Yes. Assemble up to 24 hours in advance, but avoid topping with fresh banana slices until serving. The wafers will soften more overnight, which many people love.
What size cups should I use?
Small 6–8 ounce cups are ideal for single servings.
If you want a more generous portion, use 10–12 ounce cups and add an extra layer.
Can I use homemade pudding instead of instant?
Absolutely. Cooked vanilla pudding works well—just cool it completely before layering to prevent the wafers from getting soggy too fast.
How do I keep the bananas from turning brown?
Use firm, just-ripe bananas and assemble close to serving time. A light brush of lemon juice helps, and keeping the bananas tucked under pudding layers limits air exposure.
What milk works best for instant pudding?
Whole or 2% milk sets the best texture.
Skim milk can lead to a thinner pudding, and non-dairy milks may not thicken as well unless the pudding mix specifies they’re suitable.
Can I make this gluten-free?
Yes. Use certified gluten-free vanilla wafers or cookies, and check the pudding mix label to ensure it’s gluten-free.
What if I don’t have vanilla extract?
You can skip it, or add a pinch of ground cinnamon for warmth. Almond extract is strong, so use only a tiny drop if substituting.
How many servings does this recipe make?
Two 3.4-ounce boxes of instant pudding, plus mix-ins, typically make 8–10 smaller cups or 6 larger cups.
It depends on cup size and layering depth.
Can I use whipped topping instead of fresh whipped cream?
Yes. It’s convenient and stable. Fold some into the pudding for a lighter texture and reserve some for the top.
Why is my pudding runny?
Usually it’s from using the wrong milk or not whisking long enough.
Use cold milk, follow the package measurements, and allow time to set before layering.
Final Thoughts
These easy banana pudding dessert cups bring classic flavor with minimal effort. They’re creamy, comforting, and great for parties, weeknights, or last-minute cravings. Keep the ingredients on hand, and you can whip up a batch anytime.
Simple, familiar, and always a hit—this is dessert done right.